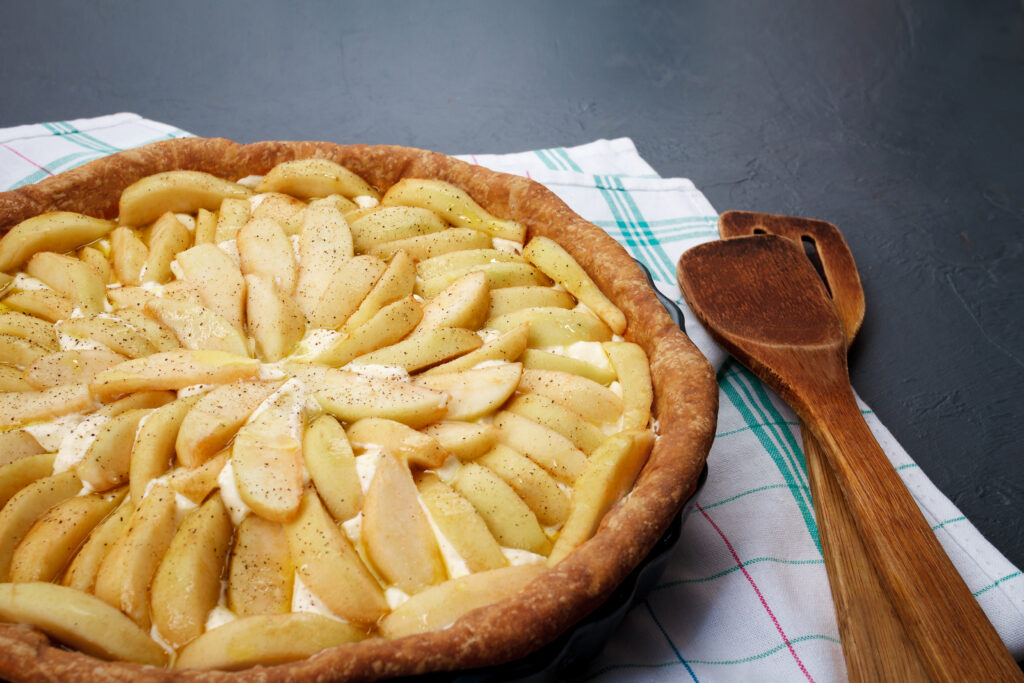
Classic Apple Pie

Apple Pie is the benchmark of classic baking—structured filling + laminated crust + balanced sweetness and acidity. This version pre-cooks the apples to control moisture and texture, ensuring a sliceable filling and a crisp, non-soggy crust. The combination of cinnamon, nutmeg, and lemon juice creates a well-rounded flavor profile: warm, spiced, and bright.

A Warm, Cozy Hug in Every Flaky Bite

There is a reason Classic Apple Pie never goes out of style. From the nostalgic aroma of cinnamon wafting through the house to that first bite of golden, flaky crust, it is the ultimate experience in comfort. Whether you are celebrating the holiday season or just satisfying a sweet craving, a slice of warm pie with a scoop of melty ice cream is a surefire way to bring the whole family together.

Why This Recipe Wins

  • The Texture Balance: By mixing different apple varieties, you get a filling that is perfectly sweet, slightly tart, and holds its shape beautifully.
  • Flaky Crust Perfection: Homemade pie crust may seem intimidating, but with a little practice and cold butter, you’ll achieve those “picture-perfect” layers that crumble just right.
  • Kid-Friendly Kitchen Fun: From using an “apple peeler-corer-slicer” to crimping the edges of the dough, this recipe is a fantastic way to get your little helpers involved in the magic of baking.
  • Versatile Comfort: This filling technique works just as well for a Maple Pumpkin Pie or even a savory Chicken Pot Pie base!

What You’ll Need

  • Double Layer Homemade Pie Crust: Keeping your butter cold is the secret to those delightful flaky layers.
  • The Apple Mix: A combination of tart (like Granny Smith) and sweet (like Honeycrisp or Fuji) apples.
  • The Sweeteners: A mix of brown and white sugar adds a deep, caramelized flavor.
  • Warming Spices: Cinnamon and nutmeg are essential for that classic “cozy” profile.
  • Thickening Trio: Butter, lemon juice, and a bit of flour to ensure the filling is luscious, not runny.

How to Make It

  1. The Crust: Prepare your dough and let it chill. Roll out the bottom layer and fit it into your pie plate.
  2. The Filling: Peel and slice apples to 1/4-inch thickness. Toss them with the sugars, flour, lemon juice, spices, and butter.
  3. The Pre-Cook: Gently cook the apple slices in a pan just until they lose their “crunch”—this ensures the filling is tender and doesn’t shrink too much in the oven.
  4. The Assembly: Pour the filling into the bottom crust. Top with the second layer of dough and crimp the edges shut to seal in the goodness.
  5. The Finish: For a deep golden color, brush the top with an egg wash (one egg plus a tablespoon of water) and a sprinkle of coarse sugar.
  6. The Bake: Bake until the crust is perfectly golden.
  7. The Wait: Let the pie cool for at least one hour. This is the hardest part, but it’s the secret to getting neat, sliceable pieces!

Get the Kids Involved: The “Apple Architects”

Baking a pie is like a delicious edible construction project for kids of all ages.

  • Ages 3–5: Let them be the “Apple Tasters.” While you slice, they can taste the different varieties to decide which is their favorite. They can also help “press” the edges of the crust with a fork.
  • Ages 6–9: Have them help “The Great Peel.” If you have an apple peeler-corer-slicer, let them take the lead—it’s a total “Kids Can Cook” highlight!
  • Ages 10+: Let them lead the “Crimp & Decorate.” They can practice different crimping styles or use leaf-shaped cookie cutters to make decorative cut-outs for the top crust.

Tips for Success

  • Don’t Overwork the Dough: Handle the crust as little as possible. You want to see those little bits of butter in the dough—that’s what creates the steam pockets for a flaky finish!
  • Slicing Consistency: Try to keep your apple slices uniform. This ensures they all cook at the same rate so you don’t end up with some mushy and some firm pieces.
  • The Shortcut: If you’re short on time, don’t sweat it! You can always use high-quality store-bought dough sheets or a frozen deep-dish crust and still get that incredible homemade flavor.
  • Serve it Up: While ice cream is the classic “A La Mode” choice, a dollop of fresh whipped cream is just as heavenly.

Serve & Savor

This Classic Apple Pie is more than a dessert; it’s a memory in the making. It’s the perfect way to use up those fall harvest apples and create a centerpiece for your holiday table that everyone will be talking about.

Print
clockclock iconcutlerycutlery iconflagflag iconfolderfolder iconinstagraminstagram iconpinterestpinterest iconfacebookfacebook iconprintprint iconsquaressquares iconheartheart iconheart solidheart solid icon

Classic Apple Pie

5 Stars 4 Stars 3 Stars 2 Stars 1 Star

No reviews

Apple Pie is the benchmark of classic baking—structured filling + laminated crust + balanced sweetness and acidity. This version pre-cooks the apples to control moisture and texture, ensuring a sliceable filling and a crisp, non-soggy crust. The combination of cinnamon, nutmeg, and lemon juice creates a well-rounded flavor profile: warm, spiced, and bright.

Ingredients

Scale
  • Homemade or store-bought pie crust (top & bottom)
  • 8 apples, peeled and sliced (¼-inch thick)
  • 2 teaspoons cinnamon
  • 1/4 teaspoon nutmeg
  • 1/4 cup granulated sugar
  • 1/4 cup brown sugar
  • 1/4 cup all-purpose flour
  • Juice of 1 small lemon (~1½ tbsp)
  • 1 tablespoon butter
  • 1 egg (for egg wash)
  • Ice cream or whipped cream (optional, for serving)

Instructions

    1. Prepare the crust
      Roll out and refrigerate the pie dough until ready to use.

    2. Make the filling
      In a large bowl, combine apples, cinnamon, nutmeg, both sugars, flour, and lemon juice. Mix thoroughly.

    3. Pre-cook the apples (critical step)
      Melt butter in a large sauté pan over medium heat.
      Add the apple mixture and cook for 5–7 minutes, just until slightly softened (not mushy).
      Remove and let cool.

    4. Preheat oven
      Set oven to 400°F (200°C).

    5. Assemble the base
      Roll out half the dough slightly larger than your pie dish. Transfer to the dish and trim/tuck edges.

    6. Fill the pie
      Add the cooled apple mixture. Chill briefly while preparing the top crust.

    7. Top crust & seal
      Roll out the second dough portion. Place over the filling, fold edges under, and crimp to seal.

    8. Egg wash
      Brush the top lightly with beaten egg for a golden finish.

    9. Bake
      Place pie on a baking sheet (to catch overflow). Bake for 50–60 minutes, until crust is golden.

    10. Cool before slicing
      Let the pie rest at room temperature for 1–3 hours. This stabilizes the filling for clean slices.

    11. Serve
      Slice and serve with ice cream or whipped cream if desired.

Notes

  • Use a mix of tart and sweet apples (e.g., Granny Smith + Fuji) for better flavor complexity.
  • Keep butter and dough cold at all times to preserve flakiness (steam pockets = layers).
  • Cut vent slits in the top crust to release steam and prevent sogginess.

Want To save this Recipe?

Picture of One Potato

One Potato

One Potato is a community and newsletter written by real people who are parents, having real conversations about our families, cooking traditions, and cultures.

Healthy New Year Recipe

Subscribe Here

Want to be a guest writer ?

Check out our Community Voices Info Page, and get in touch.

Advertise with Us

One Potato is a community and newsletter written by real people who are parents, having real conversations about our families, cooking traditions, and cultures. We are passionate about raising healthy and happy kids while navigating the challenges of picky eaters, dietary restrictions, busy schedules, and daily life.