The Nostalgic Lunchbox Upgrade
There is nothing quite like the classic combination of peanut butter and jelly to bring back childhood memories. These Homemade PB&J Pop Tarts take that lovable flavor duo and wrap it in a flaky, golden pastry crust that puts the store-bought version to shame. They are the ultimate handheld treat—perfect for busy mornings, a special school lunch surprise, or a quick snack that both kids and adults will adore.
Why This Recipe Wins
- Three-Ingredient Magic: At its core, all you need is pie dough, peanut butter, and your favorite jam. It doesn’t get simpler than that!
- Wholesome & Preservative-Free: By making these at home, you skip the long list of artificial ingredients found in packaged toaster pastries, serving up a “healthier option” you can feel good about.
- Prep-Ahead Convenience: These are a “meal prep hero.” You can flash-freeze a batch of unbaked tarts and pop them directly into the oven on those extra-busy mornings.
- Endlessly Adaptable: Whether you’re a fan of strawberry, raspberry, or grape, any jam or preserves will work beautifully.
What You’ll Need
- Pie Dough: Use a high-quality homemade crust or a store-bought version for ease.
- Peanut Butter: Thick and creamy works best. (If using organic, give it a very good stir to incorporate the oils so it doesn’t leak!)
- Jam or Preserves: Choose your favorite fruit flavor—smoother jams or chunkier preserves both taste incredible.
How to Make It
- The Prep: Preheat your oven to 400°F.
- The Cut: Roll out your pie crust to 1/4-inch thickness. Cut the dough into 2×3 inch rectangles.Pro Tip: Use a ruler and a pizza cutter to get those perfectly straight, uniform edges!
- The Filling: Place one rectangle on a floured surface. Add 1 teaspoon of peanut butter and 1 teaspoon of jam to the very center.
- The Seal: Dip your finger in water and “brush” the border of the dough. Top with a second rectangle. Use the tines of a fork to press down the edges firmly, creating a decorative and functional seal.
- The Vent: Gently poke a few small holes in the top with a toothpick or fork to let steam escape during baking.
- The Bake: Place on a lined baking sheet and bake for 18 minutes or until beautifully golden.
Get the Kids Involved: The “Pastry Pressers”
Since this recipe uses familiar flavors and feels like a fun “craft,” kids are usually eager to help out in the kitchen.
- Ages 3–5: Let them be the “Water Brushers.” They can use their fingers to paint the water “glue” around the edges of the dough—a vital step for keeping the filling inside!
- Ages 6–9: Have them help “The Fork Crimpers.” Show them how to press the fork into the edges to seal the pop tarts. It’s a great way to practice fine motor skills.
- Ages 10+: Let them lead the “Shape Design.” While rectangles are classic, older kids can use large cookie cutters to make stars, hearts, or even Pumpkin Pie Pop Tarts for a festive twist.
Tips for Success
- Keep it Chilly: Cold dough is the secret to a flaky crust. If the dough starts to feel soft or sticky while you’re working, pop it in the fridge for 10 minutes to firm back up.
- Don’t Overfill: It’s tempting to pile on the PB&J, but keeping it to a teaspoon each ensures the tarts don’t “explode” or leak in the oven.
- Storing Secrets: These stay fresh on the counter for 3 days, but they are also delicious when pulled straight from the fridge!
- Baking from Frozen: If you’ve frozen a batch of unbaked tarts, you don’t even need to thaw them—just add 2 extra minutes to the baking time.
Serve & Savor
These Peanut Butter and Jelly Pop Tarts prove that the best snacks are often the ones made with love at home. They are a “nostalgic favorite” that feels brand new again.
Peanut Butter and Jelly Pop Tarts
5 Stars 4 Stars 3 Stars 2 Stars 1 Star
No reviews
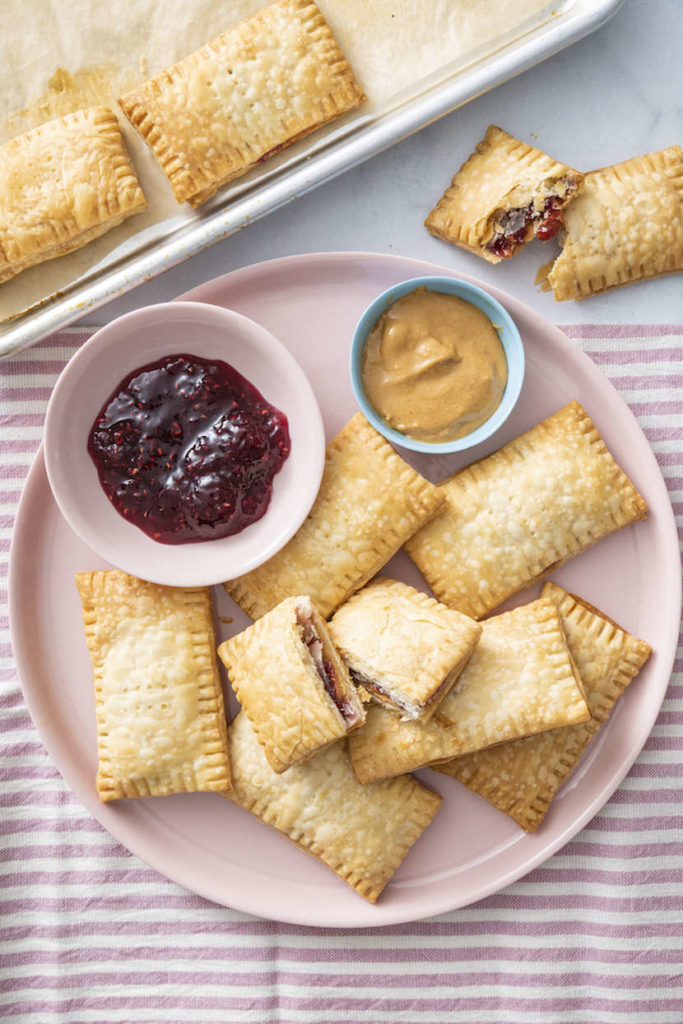
Peanut Butter and Jelly Pop Tarts bring a nostalgic twist to a childhood classic. Flaky pastry filled with creamy peanut butter and sweet preserves makes these perfect for a quick snack or fun homemade treat.
Ingredients
- 1/4 cup smooth peanut butter
- 1/4 cup preserves (any flavor)
- 1 recipe pie dough (homemade or store-bought)
- Water (for sealing edges)
Instructions
- Preheat oven to 400°F (200°C).
- Roll out the pie dough to about 1/4-inch thick.
- Cut into rectangles approximately 2×3 inches.
- Place one rectangle on a lightly floured surface.
- Add 1 teaspoon peanut butter and 1 teaspoon preserves to the center.
- Lightly brush the edges with water using your finger.
- Place another rectangle on top and press edges together.
- Use a fork to crimp the edges and seal completely.
- Poke small holes on top to allow steam to escape.
- Transfer to a lined baking sheet and bake for 18 minutes or until golden brown.
Notes
- Filling shortcut: Mix peanut butter and preserves together, then use 2 teaspoons per tart.
- Storage: Keep in an airtight container at room temperature for up to 3 days or refrigerate up to 5 days.
- Freezing: Freeze unbaked tarts for up to 3 months. Bake straight from frozen, adding about 2 extra minutes.
- Seal properly: Press edges firmly to prevent filling from leaking.
- Variation idea: Add a light glaze or sprinkle sugar on top before baking for extra texture.
- Author: Miks


