Print
Chocolate Reindeer Bark
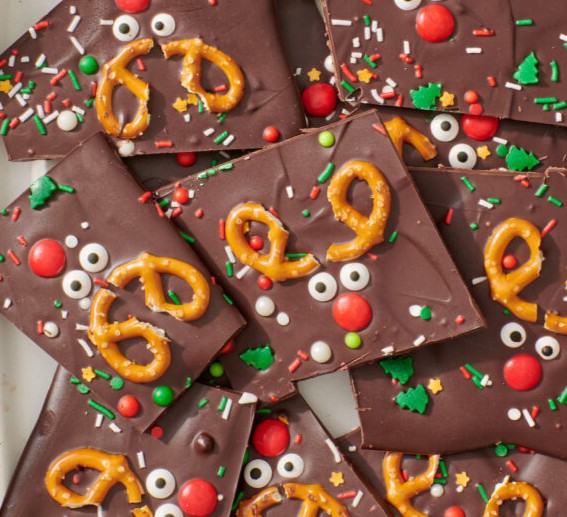
Chocolate Reindeer Bark is a festive, no-bake holiday treat that’s as fun to make as it is to eat. With adorable reindeer faces and crunchy toppings, it’s perfect for kids, gifting, or holiday parties.
Ingredients
Scale
- 2 (12-ounce) bags dark chocolate chips
- 1 tablespoon coconut oil
- Small pretzels
- Holiday sprinkles
- Red candy-coated chocolates
- Candy eyes
Instructions
- Prepare the pretzel antlers:
- Cut mini pretzels in half lengthwise.
- Trim into antler-like shapes using a small knife.
- Melt the chocolate:
- Combine chocolate chips and coconut oil in a bowl.
- Microwave for 1 minute, stir, then heat in 30-second intervals until smooth.
- Form the bark base:
- Pour melted chocolate onto a parchment-lined baking sheet.
- Spread into a ¼-inch thick rectangle.
- Add toppings:
- Sprinkle holiday sprinkles over the chocolate.
- Place a red candy for the nose.
- Add candy eyes just above.
- Position pretzel antlers above the eyes to form reindeer faces.
- Set the bark:
- Freeze for 15 minutes (or longer until firm).
- Break and serve:
- Cut or break into pieces.
- Store in the refrigerator or freezer, or package for gifting.
Notes
- Clean cuts: Let the bark sit briefly after freezing before cutting.
- Smooth chocolate: Melt in short intervals to avoid burning.
- Get creative: Vary antler shapes for a playful look.
- Make it a family activity: Let kids design their own reindeer faces.
- Storage: Keep refrigerated for best texture and freshness.
- Gifting tip: Use festive boxes or bags for a polished presentation.