" "

Fruit and Oat Crumble Bars

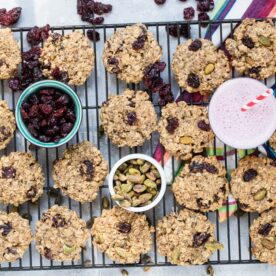
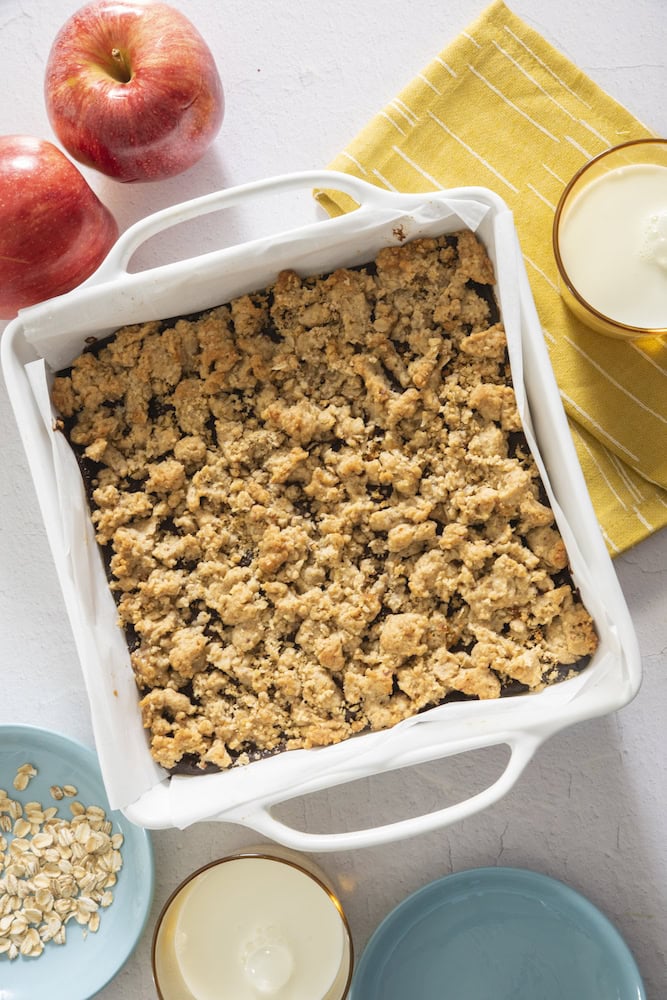
These Fruit and Oat Crumble Bars are an easy, chewy snack with a buttery oat topping and a sweet layer of fruit preserves. They’re simple to make, easy to pack for lunchboxes, and a great way to have a homemade snack ready when hunger hits.

The “Soft & Chewy” Fruit and Oat Crumble Bars

When you’re tasked with packing a healthy, “midday-hunger-crushing” family snack, sometimes the best solution is to skip the dry, store-bought boxes entirely. These Fruit and Oat Crumble Bars use wholesome oats, sweet fruit, and fiber-rich ingredients to create a soft, chewy treat right at home. It’s a “wholesome” twist that had the in-house testers absolutely thrilled—to the point where one could barely hear a muffled “pass another square” through bites of soft, fruity goodness!

Why This Recipe Wins

  • Nutrient Power: By incorporating fiber-packed oats and natural fruit directly into the layers, the dish provides a “filling and tasty” boost that easily crushes midday hunger.
  • Snack Time Surprise: Moving away from a “standard tedious routine” of dry, sugar-laden packaged bars makes opening a lunchbox feel like a “special holiday” treat.
  • Naturally Chewy: Tweaking the bake time and ingredients provides a “rich yet robust” texture that remains perfectly soft rather than crunchy and dry.
  • On-the-Go Ease: These “kid-approved portions” are easy to make and slice into squares, making them an ideal choice for busy mornings or afternoon pick-me-ups.

What You’ll Need

  • The Hearty Base: Whole grain oats to provide that classic, comforting crumble texture and plenty of fiber.
  • The Sweet Center: Your favorite fruit spread or fresh chopped fruit to create a vibrant, jammy middle layer.
  • The Better Binder: A touch of natural sweetener (like honey or maple syrup) to keep them soft without the junk found in store-bought equivalents.
  • The Pantry Staples: Flour, butter (or coconut oil), and a pinch of salt to hold the crumbly crust together.

How to Make It

  • The Base Prep: Press half of your oat mixture firmly into the bottom of a lined baking pan so it is primed to hold the jam and get “perfectly crisp” along the bottom edges.
  • The Fruit Layer: Spread the fruit filling over the oat base, distributing it “thoroughly, but gently” so it doesn’t tear the bottom crust.
  • The Crumble Top: Sprinkle the remaining oat mixture over the fruit until the top looks beautifully “velvety smooth” and evenly covered.
  • The Bake: Bake in the oven until the fruit is bubbling and the oat topping turns a gorgeous “golden-brown.”
  • The Plate: Let them cool completely so they set into soft, chewy squares, and pack them up for a delicious, “mess-proof” masterpiece!

Get the Kids Involved: The “Crumble Crew”

Since pressing layers and sprinkling oats is super tactile, this is a “ton of fun” for kids to help assemble and enjoy.

  • Ages 3–5: Let them be the “Crumble Sprinklers.” They can help scatter the remaining oat mixture over the top of the fruit, practicing their “precision.”
  • Ages 6–9: Have them help as “The Jam Spreaders.” Show them how smoothing the fruit layer creates a “scrumptious” and colorful sweet center.
  • Ages 10+: Let them lead the “Base Pressing.” Under supervision, they can pack the bottom oat layer into the pan and look for the “magic chewiness” once the bars cool and are ready to slice.

Tips for Success

  • Bake Time is Crucial: If you leave them in the oven too long, the crust will dry out. Pulling them out on time is imperative to achieve that “tender and rich” soft, chewy bite.
  • Cooling Matters: The goal is a perfect square, so letting the bars cool completely before slicing ensures the fruit filling stays “refreshing and light” and holds its neat shape.
  • The Meal Prep Trick: One can make a “huge batch” of these crumbly squares on Sunday for the week ahead.

Lunchbox Note: Keep a stash of these healthy fruit bars wrapped up in the fridge or freezer! It makes grabbing an on-the-go snack or breakfast a “quick and easy” task that the whole family will ask for all winter long.

  • Variation: For a “decadent and indulgent” twist, fold mini dark chocolate chips or chopped walnuts into the oat mixture before baking to elevate the flavor profile even further.

Serve & Savor

The Fruit and Oat Crumble Bars are a “tantalizing taste sensation” that proves low-sugar, fiber-packed snacks can be “out of this world” delicious. It’s a “versatile” recipe that turns simple oats and fruit into a “memory-making” family favorite.

Print
clockclock iconcutlerycutlery iconflagflag iconfolderfolder iconinstagraminstagram iconpinterestpinterest iconfacebookfacebook iconprintprint iconsquaressquares iconheartheart iconheart solidheart solid icon

Fruit and Oat Crumble Bars

5 Stars 4 Stars 3 Stars 2 Stars 1 Star

No reviews

These Fruit and Oat Crumble Bars are an easy, chewy snack with a buttery oat topping and a sweet layer of fruit preserves. They’re simple to make, easy to pack for lunchboxes, and a great way to have a homemade snack ready when hunger hits.


Ingredients

Scale
  • 2 cups old-fashioned oats
  • 1 cup all-purpose flour
  • 2 tablespoons wheat germ
  • 1/2 teaspoon baking soda
  • 10 tablespoons butter
  • 1/3 cup chopped nuts, such as almonds
  • 1/4 cup honey
  • 2 cups apple butter or your favorite fruit preserves

Instructions

  1. Get the oven ready: Preheat the oven to 350°F. Grease a 9 x 9-inch baking pan and line it with parchment paper, leaving some parchment hanging over the sides.
  2. Make the oat mixture: Add the oats, flour, wheat germ, baking soda, butter, nuts, and honey to a food processor. Pulse until combined and the oats and nuts are broken into small pieces.
  3. Build the first layer: Press all but 1 cup of the oat mixture firmly into the bottom of the prepared pan.
  4. Add the fruit: Spread the apple butter or preserves evenly over the oat base.
  5. Add the crumble: Sprinkle the remaining oat mixture over the fruit layer.
  6. Bake: Bake for 30–35 minutes, until the top is golden brown.
  7. Cool and cut: Let the bars cool completely. Use the parchment paper to lift them from the pan and transfer to a cutting board. For cleaner cuts, refrigerate for about 1 hour before slicing.

Notes

  • Line the pan with parchment: It makes lifting and cutting the bars much easier.
  • Chill before cutting: Refrigerating the baked bars helps them firm up for cleaner squares.
  • Switch the fruit: Use your favorite jam, preserves, or apple butter.
  • Make them nut-free: Simply leave out the nuts or replace them with extra oats.
  • Make a batch ahead: These bars are easy to portion and pack for snacks throughout the week.

Want To save this Recipe?

Picture of One Potato

One Potato

One Potato is a community and newsletter written by real people who are parents, having real conversations about our families, cooking traditions, and cultures.

Healthy New Year Recipe

Subscribe Here

Want to be a guest writer ?

Check out our Community Voices Info Page, and get in touch.

Advertise with Us

One Potato is a community and newsletter written by real people who are parents, having real conversations about our families, cooking traditions, and cultures. We are passionate about raising healthy and happy kids while navigating the challenges of picky eaters, dietary restrictions, busy schedules, and daily life.