Print
Holiday Baked Alaska
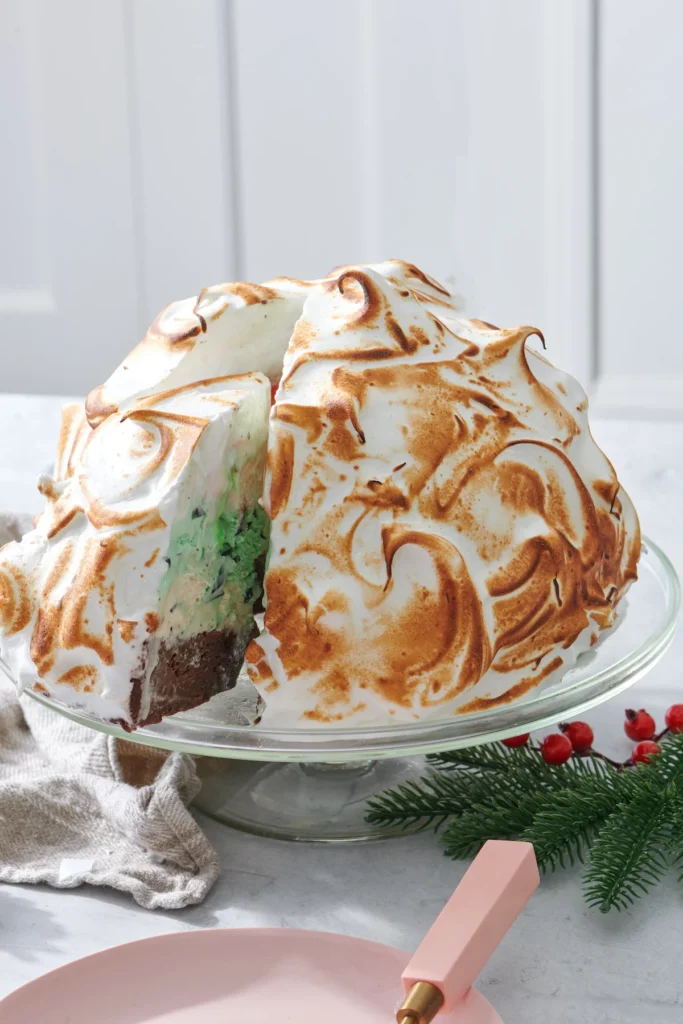
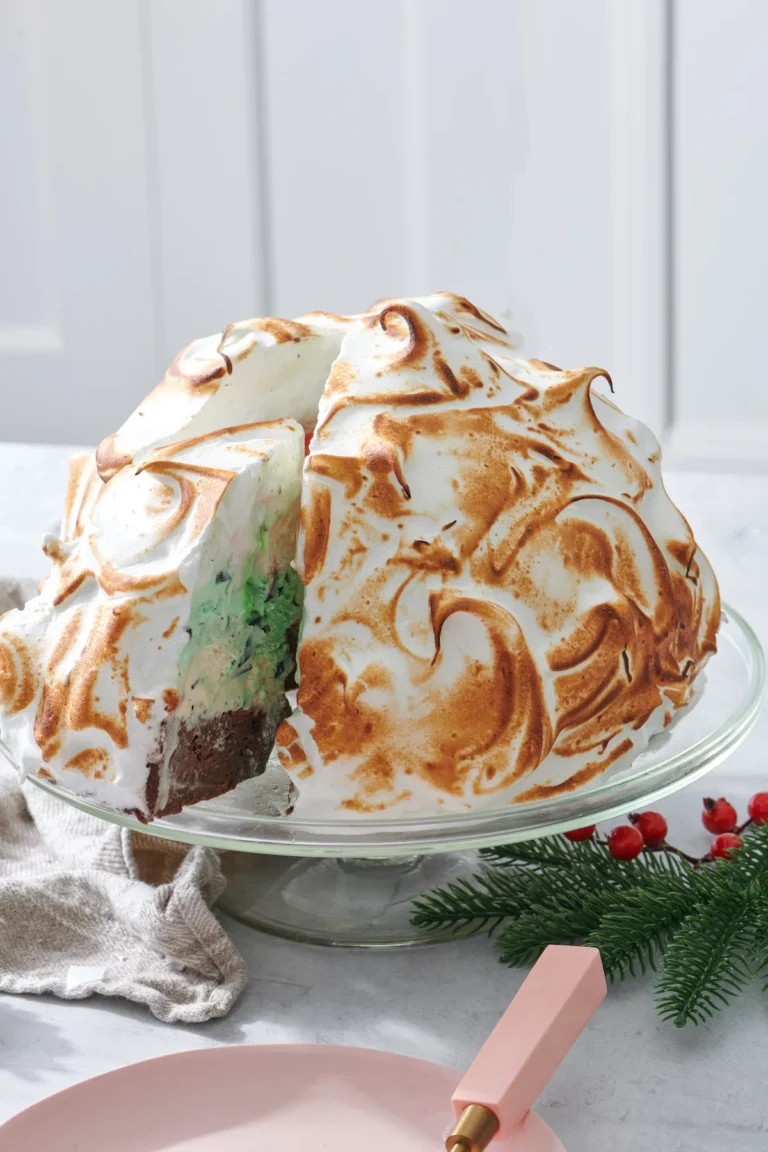
Holiday Baked Alaska is a classic, show-stopping dessert featuring layers of ice cream over a rich brownie base, all wrapped in a fluffy toasted meringue. It’s dramatic, festive, and absolutely unforgettable.
Ingredients
Scale
Ice Cream Dome:
- 1 pint peppermint ice cream, softened
- 1.5 quarts mint chocolate chip ice cream, softened
- 1.5 quarts vanilla ice cream, softened
Brownie Base:
- 1 cup butter
- 8 oz bittersweet chocolate
- 4 eggs
- 2 cups sugar
- 2 teaspoons vanilla extract
- 1 1/4 cups flour
- 1 teaspoon baking powder
- 1/2 teaspoon kosher salt
Meringue Topping:
- 8 egg whites, room temperature
- 1/4 teaspoon cream of tartar
- 1 cup sugar
Instructions
1. Make the Ice Cream Dome
- Line a 4-quart bowl (about 9-inch diameter) with plastic wrap.
- Add softened peppermint ice cream, smooth evenly, and freeze 30 minutes.
- Repeat layering with mint chocolate chip, then vanilla, freezing between each layer.
- Cover and freeze for at least 8 hours or overnight until solid.
2. Make the Brownie Base
- Preheat oven to 350°F (175°C).
- Grease and line a 9-inch cake pan with parchment.
- Melt butter and chocolate using a double boiler or microwave.
- In a bowl, whisk eggs, sugar, and vanilla.
- In another bowl, whisk flour, baking powder, and salt.
- Combine melted chocolate with egg mixture.
- Add dry ingredients and mix until smooth.
- Pour into pan and bake 50–60 minutes.
- Cool completely.
3. Assemble the Baked Alaska
- Turn cooled brownie onto a large ovenproof plate.
- Unmold the frozen ice cream dome and place on top.
- Remove plastic wrap and return to freezer.
4. Make the Meringue
- Beat egg whites and cream of tartar for 2 minutes on medium-high.
- Increase speed and slowly add sugar.
- Beat until stiff (not dry) peaks form, about 4 minutes.
5. Finish & Freeze
- Cover the ice cream dome completely with meringue.
- Create decorative peaks with a spoon.
- Freeze for at least 3 hours or up to 2 days.
6. Toast the Meringue
- Use a kitchen torch to brown evenly, moving constantly.
OR - Broil on the lowest rack until golden (watch closely).
7. Serve
- Slice using a knife dipped in hot water for clean cuts.
- Serve immediately.
Notes
- Layer freezing is crucial: Prevents ice cream flavors from blending.
- Work fast: Ice cream melts quickly during assembly—return to freezer as needed.
- Make ahead: Components can be prepared days in advance.
- Flavor flexibility: Swap ice cream flavors to match your theme.
- Even toasting: Rotate while torching or broiling to avoid burning.
- Clean slicing: Warm knife between cuts for neat presentation.