Print
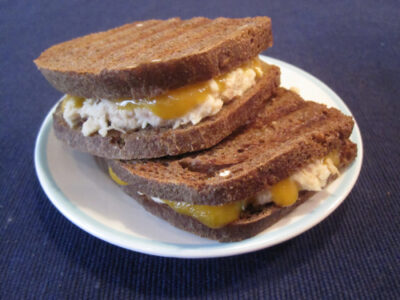
Pumpernickel Tuna Melt
A savory, bite-sized twist on the classic tuna melt—served on rich pumpernickel bread with melted cheddar cheese.
Ingredients
Scale
- 1 (5 oz) can tuna (light or chunk white, packed in water)
- 1 celery stalk, finely chopped
- 1 teaspoon Dijon mustard
- 1 teaspoon mayonnaise
- 4 slices cheddar cheese
- 8 slices pumpernickel toasts (cocktail-sized bread)
Instructions
1. Prepare Tuna Mixture
- In a bowl, combine:
- Tuna
- Chopped celery
- Dijon mustard
- Mayonnaise
- Mix until well incorporated.
2. Assemble Sandwiches
- Spread about 1/4 of the tuna mixture onto one slice of pumpernickel toast.
- Top with a slice of cheddar cheese.
- Cover with another slice of toast to form a sandwich.
3. Cook
- Panini Press: Cook on medium heat for 3 minutes
- Stovetop: Cook in a sauté pan for 2 minutes per side, until golden and cheese is melted
4. Serve
- Serve warm while the cheese is melted and gooey.
Notes
- Drain tuna well: Prevents soggy sandwiches
- Finely chop celery: Ensures even texture
- Use medium heat: Allows cheese to melt without burning bread