Tender, Creamy, and Perfectly Balanced
Tres leches cake is a classic for a reason. This version is moist without being soggy—the sponge is sturdy enough to soak up the signature “three milks” mixture while still holding its shape. It’s a celebratory dessert that actually improves with time, making it the ultimate make-ahead treat for holidays, birthdays, or any gathering where you want a guaranteed crowd-pleaser.
Why This Recipe Wins
- The Perfect Crumb: We use a light sponge base that acts like a delicious sponge, absorbing the creamy liquid without collapsing.
- Make-Ahead Friendly: You can (and should!) make this the night before. Let the fridge do the work of infusing the cake with flavor.
- Simple & Familiar: No fancy techniques or “precious” ingredients required—just straightforward baking that delivers big results.
- Great for Crowds: It slices beautifully and stays fresh in the fridge for days.
What You’ll Need
The Sponge Base:
- Eggs (Separated): Whipped whites are the secret to that airy, light structure.
- Whole Milk & Vanilla: To keep the crumb soft and fragrant.
- Flour, Baking Powder, & Salt: Your reliable dry base.
The “Three Milks” (Tres Leches):
- Sweetened Condensed Milk: For sweetness and body.
- Evaporated Milk: For that classic, deep milk flavor.
- Heavy Cream: To add richness and a silky mouthfeel.
The Topping:
- Whipped Cream: Freshly beaten with a little sugar.
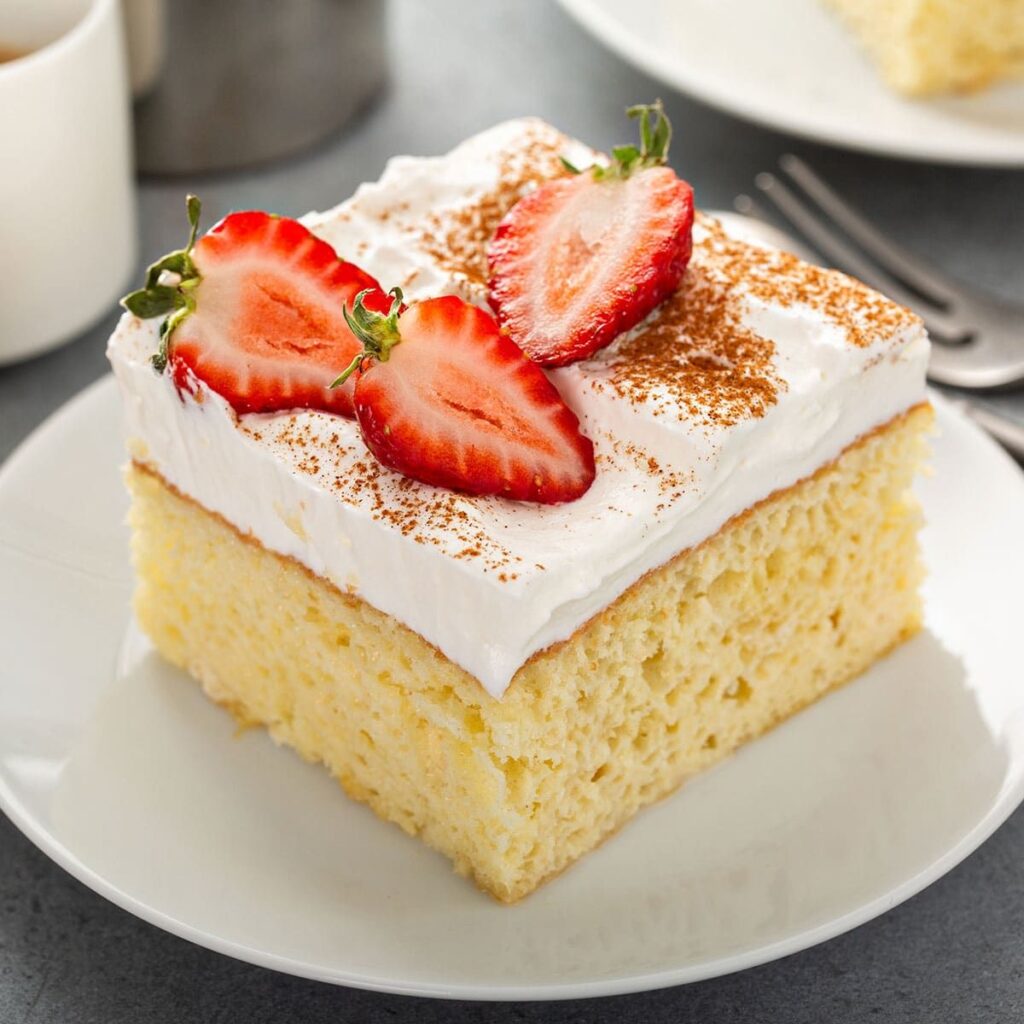
- Garnish: Fresh strawberries or a light dusting of cinnamon.
How to Make It
- The Batter: Whisk the dry ingredients. Beat egg yolks with sugar until pale, then stir in milk and vanilla. Combine the wet and dry.
- The Whites: Beat egg whites until soft peaks form, add the remaining sugar, and beat until stiff.
- The Fold: Gently fold the whites into the batter.Tip: Use a light hand here! You want to keep those air bubbles to ensure the cake stays tender.
- The Bake: Spread into a 9×13-inch pan and bake at 350°F for 35–45 minutes. Let it cool completely.
- The Poke & Soak: Use a fork to poke holes all over the cooled cake. Whisk your three milks together and slowly pour over the top.
- The Finish: Let it soak for at least 30 minutes (or overnight). Top with freshly whipped cream and fruit before serving.
Get the Kids Involved: The “Poke & Pour”
This is one of the best cakes for young kitchen helpers because the “soaking” phase is so interactive.
- Ages 3–5: Let them be the “Official Pokers.” Give them a fork and let them poke the holes into the cooled cake. It’s a great way to help without needing to be near a hot stove.
- Ages 6–9: Have them help pour the milk mixture. Doing it slowly is a great lesson in patience as they watch the liquid “disappear” into the cake.
- Ages 10+: Let them lead the “Peak Check.” Have them help beat the egg whites and identify when they’ve reached “soft peaks” versus “stiff peaks.”
Make It Your Own
- Give it Time: While 30 minutes of soaking works in a pinch, 4 hours or an overnight rest in the fridge creates a much more cohesive, creamy texture.
- Folding 101: When folding the egg whites, don’t worry about it being “perfect.” A few tiny streaks are better than over-mixing and deflating the cake.
- The Fruit Swap: While strawberries are classic, this cake is incredible topped with fresh mango, raspberries, or even toasted coconut flakes.
- Freezer Secret: If you’re planning way ahead, you can freeze the baked (unsoaked) cake. Just thaw it in the fridge, then add the milks and cream when you’re ready to serve!
Serve & Savor
Keep this cake covered in the refrigerator. It stays delicious for up to 3–4 days, though it’s rarely lasted that long in my house!
Print
Tres Leches Cake
This tres leches cake is light, tender, and gently soaked in three milks, then finished with a soft layer of whipped cream. It’s rich without being heavy and sweet without being overwhelming—exactly the kind of dessert that feels right for birthdays, holidays, and family celebrations.
It’s also a forgiving cake. You don’t need perfect timing or flawless technique for it to turn out well, and it actually improves as it rests, which makes it especially helpful on busy days.
Ingredients
(Scale as needed)
-
1 cup all-purpose flour
-
1½ teaspoons baking powder
-
¼ teaspoon kosher salt
-
5 large eggs, separated
-
1 cup plus 3 tablespoons sugar
-
⅓ cup whole milk
-
1 teaspoon vanilla extract
-
1 (14-ounce) can sweetened condensed milk
-
1 (12-ounce) can evaporated milk
-
1 pint plus ¼ cup heavy cream
Instructions
-
Preheat the oven to 350°F. Grease a 9×13-inch baking pan.
-
In a large bowl, whisk together the flour, baking powder, and salt.
-
In the bowl of an electric mixer, beat the egg yolks with ¾ cup of the sugar until very light in color.
-
Add the whole milk and vanilla, mixing just until combined.
-
Pour the wet mixture into the flour mixture and stir gently until smooth.
-
In a clean bowl, beat the egg whites on high speed until soft peaks form, about 5 minutes.
-
Add ¼ cup sugar and continue beating until the whites are stiff but not dry.
-
Gently fold the egg whites into the batter until just combined. Stop as soon as the mixture looks uniform—overmixing will deflate it.
-
Spread the batter evenly into the prepared pan. Bake for 35–45 minutes, until a toothpick inserted in the center comes out clean.
-
Remove the cake from the oven and let it cool completely in the pan.
-
Once cool, invert the cake onto a platter (or leave it in the pan, if that’s easier). Use a fork to poke holes all over the surface.
-
In a bowl, whisk together the sweetened condensed milk, evaporated milk, and ¼ cup heavy cream.
-
Slowly pour the milk mixture over the cake, letting it soak in evenly, including around the edges. Let the cake rest for at least 30 minutes, or cover and refrigerate overnight.
-
Beat the remaining heavy cream with the remaining 3 tablespoons sugar until thick and fluffy.
-
Spread the whipped cream over the top and sides of the cake. Finish with sliced strawberries or a light sprinkle of cinnamon, if you like.
Notes
-
Let it soak
Thirty minutes is the minimum, but longer resting—especially in the fridge—makes the cake even more flavorful and evenly soaked. -
Fold gently
When adding the egg whites, a light hand keeps the cake airy. It doesn’t need to be perfect—just stop once it’s combined. -
Storage
Store covered in the refrigerator for up to 3–4 days. The texture is best within the first 2–3 days, before the whipped cream softens too much. -
Freezer-friendly option
You can freeze the baked cake before adding the milk mixture. Thaw in the refrigerator, then soak and top with whipped cream when ready to serve.