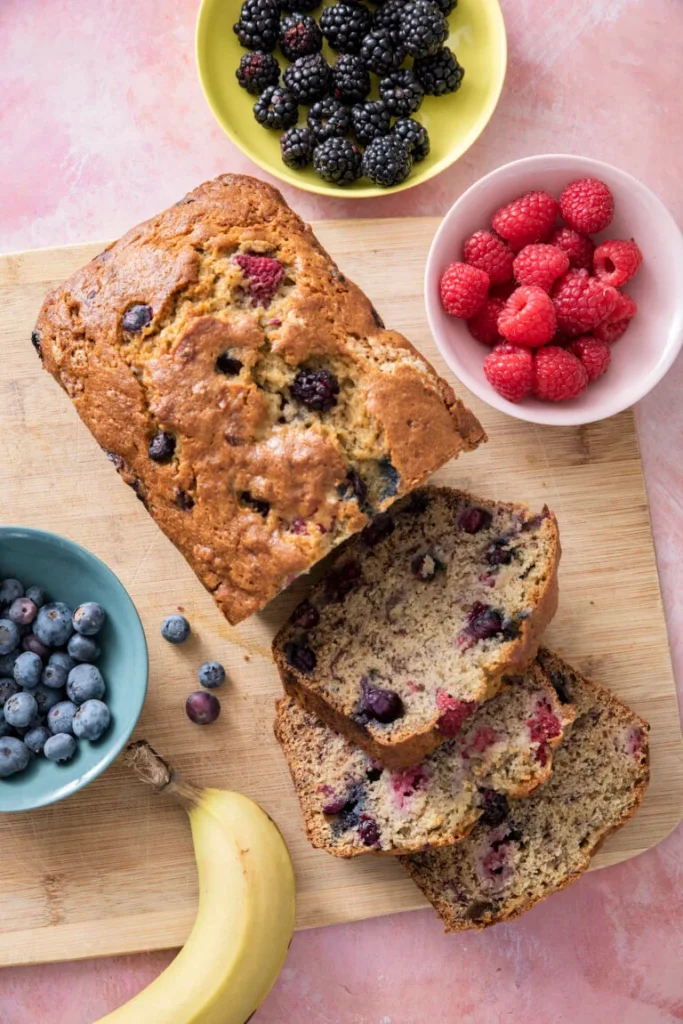
Banana Berry Bread

Soft, moist, and naturally sweet, this Banana Berry Bread is bursting with juicy berries and ripe bananas—perfect for breakfast, snack time, or a light dessert.

A Moist, Wholesome, and “Kid-Friendly” Quick Bread

This Banana Berry Bread is the perfect solution for an easy breakfast, a colorful afternoon snack, or a light dessert. Filled with naturally sweet, overripe bananas and a vibrant mix of berries, it offers a “sweet and fruity taste” that captivates both kids and adults. By using white whole wheat flour, this recipe provides a nutritional boost of fiber while maintaining a soft, fluffy texture. It’s a “breeze to make” and a fantastic way to turn those forgotten, dark-peeled bananas on your counter into a masterpiece!

Why This Recipe Wins

  • Wholesome & Nutritious: White whole wheat flour adds more nutrients than all-purpose flour without making the bread heavy or dense.
  • Versatile Berry Options: You can use fresh or frozen blueberries, raspberries, or a medley of your favorites. It’s the perfect way to use up that bag of frozen berries in your freezer!
  • Naturally Sweet: Most of the sweetness comes from the ripe bananas, meaning you only need a little extra sugar to make this the “best banana bread ever.”
  • Crowd-Pleaser: Whether you’re packing a lunchbox or hosting guests, the bright pops of berry color make this loaf as beautiful as it is delicious.

What You’ll Need

  • White Whole Wheat Flour: For a boost of fiber and nutrients.
  • Super Ripe Bananas: The darker the peels, the sweeter and better the bread will be!
  • Mixed Berries: Fresh or frozen (no need to defrost!).
  • Unsalted Butter & Sugar: Creamed together for a “depth of flavor” and light texture.
  • Pantry Basics: Eggs, milk, vanilla extract, baking soda, and a touch of kosher salt.

How to Make It

  1. The Prep: Preheat your oven to 350ºF and grease a 9×5 inch loaf pan.
  2. The Dry Mix: Whisk together the flour, baking soda, and salt in a medium bowl.
  3. The Creaming: In a standing mixer, cream the softened butter and sugar for 3 minutes until light and fluffy.
  4. The Wet Mix: Add the eggs, mashed bananas, milk, and vanilla. Mix until well-combined.
  5. The Combine: Gradually add the dry ingredients to the wet. Stir until just combined—be careful not to overmix!
  6. The Fold: Gently fold in your berries.Pro Tip: If using frozen berries, add them while still frozen! This prevents them from bleeding too much and turning your entire loaf purple or blue.
  7. The Bake: Pour into the pan and bake for 1 hour, or until a toothpick comes out clean.
  8. The Cool: Let it sit in the pan for 10 minutes before moving it to a cooling rack.

Get the Kids Involved: The “Banana Mashers”

This is one of the best recipes for little kitchen assistants because it’s tactile and simple.

  • Ages 3–5: Let them be the “Master Mashers.” Peel the ripe bananas and put them in a bowl—kids love using a fork or a potato masher to turn them into “mush.”
  • Ages 6–9: Have them help “The Berry Folders.” Show them how to use a spatula to “fold” the berries in gently so they don’t break, teaching them a classic baking technique.
  • Ages 10+: Let them lead the “Ripening Science.” If your bananas aren’t ready, they can help with the “oven ripening” trick (poking holes and watching them darken) or manage the “paper bag and apple” method.

Tips for Success

  • The Ripening Hack: In a rush? Place bananas on a sheet pan, poke them with a fork, and bake at 350°F for 15 minutes. They will come out soft, sweet, and perfect for baking.
  • Avoid the Bleed: To keep the bread looking “bright and beautiful,” don’t defrost frozen berries. Adding them straight from the freezer keeps the juices contained until they hit the oven heat.
  • Don’t Overmix: Once the flour hits the wet ingredients, stir only until you don’t see any more white streaks. This ensures your bread stays “soft and moist” rather than tough.
  • Storage Secrets: This bread stays moist at room temperature for 2-3 days if wrapped tightly. You can also freeze individual slices in zipper bags for up to 3 months for a quick “grab-and-go” breakfast.

Serve & Savor

Banana Berry Bread is a “delightful baking experience” that brings a touch of sunshine to your table. It’s a “versatile” treat that proves healthy ingredients can be incredibly delicious.

Print
clockclock iconcutlerycutlery iconflagflag iconfolderfolder iconinstagraminstagram iconpinterestpinterest iconfacebookfacebook iconprintprint iconsquaressquares iconheartheart iconheart solidheart solid icon

Banana Berry Bread

5 Stars 4 Stars 3 Stars 2 Stars 1 Star

No reviews

Filled with naturally sweet bananas and beautiful bright berries, this moist Banana Berry Bread is perfect for a quick breakfast or delicious snack!
 

Ingredients

Scale
  • 2 cups white whole wheat flour
  • 1 teaspoon baking soda
  • 1/2 teaspoon kosher salt
  • 1/2 cup unsalted butter, softened
  • 3/4 cup sugar
  • 2 large eggs
  • 3 small ripe bananas, mashed
  • 1/3 cup milk
  • 2 teaspoons vanilla extract
  • 2 cups mixed berries (fresh or frozen)

Instructions

1. Preheat & Prep

  • Preheat oven to 350°F (175°C).
  • Grease a 9×5-inch loaf pan.

2. Mix Dry Ingredients

  • In a bowl, whisk together flour, baking soda, and salt.

3. Cream Butter & Sugar

  • In a mixer, beat butter and sugar for about 3 minutes until light and fluffy.

4. Add Wet Ingredients

  • Add eggs, mashed bananas, milk, and vanilla.
  • Mix until well combined.

5. Combine & Fold

  • Gradually add dry ingredients into wet mixture.
  • Mix until just combined (do not overmix).
  • Gently fold in berries.
    • Tip: If using frozen berries, add them frozen to prevent color bleeding.

6. Bake

  • Pour batter into prepared loaf pan.
  • Bake for about 1 hour, or until a toothpick inserted comes out clean.

7. Cool & Serve

  • Cool in pan for 10 minutes, then transfer to a rack.
  • Slice and enjoy!

Notes

  • Do not overmix: Keeps the bread soft and tender.
  • Use ripe bananas: The riper, the sweeter and more flavorful.
  • Frozen berries tip: Prevents the batter from turning purple.
  • Even baking: Check at 50 minutes to avoid overbaking.

Want To save this Recipe?

Picture of One Potato

One Potato

One Potato is a community and newsletter written by real people who are parents, having real conversations about our families, cooking traditions, and cultures.

Healthy New Year Recipe

Subscribe Here

Want to be a guest writer ?

Check out our Community Voices Info Page, and get in touch.

Advertise with Us

One Potato is a community and newsletter written by real people who are parents, having real conversations about our families, cooking traditions, and cultures. We are passionate about raising healthy and happy kids while navigating the challenges of picky eaters, dietary restrictions, busy schedules, and daily life.