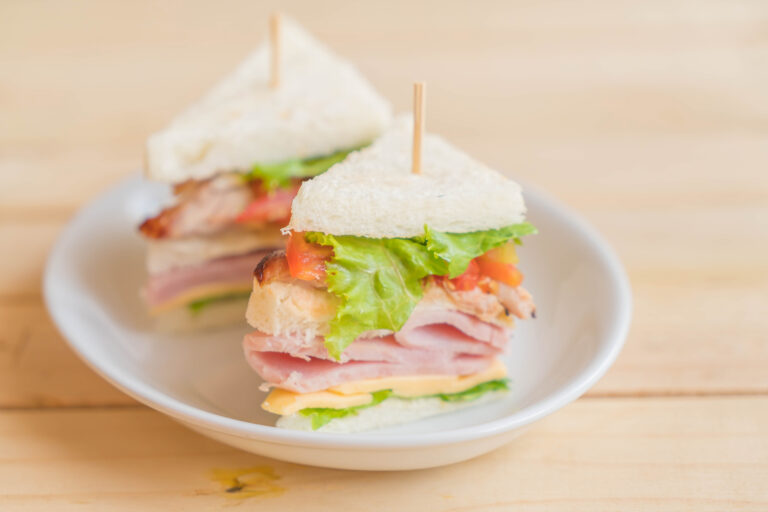
Sandwich-on-a-Stick

A fun, portable twist on the classic sandwich—perfect for kids, parties, or quick snacks. No slicing, no mess—just stack, skewer, and enjoy.

The “Lunch on a Stick” Revolution

If you’re tired of the same old “lunch by rote”—bread, spread, fillings, repeat—it’s time to shake things up. Putting a sandwich on a stick is a total game-changer. Not only does it make the meal “unique and exciting,” but it also solves the age-old problem of soggy bread. Because the ingredients aren’t sitting directly on a spread for hours, everything stays “vibrant and fresh” until the very first bite. My kids let out a little chuckle when they first saw these in their lunch boxes, but once they started “sliding off the ingredients,” they were totally hooked!

Why This Recipe Wins

  • Deconstructed Freshness: Since the bread, meat, and veggies are separated, you get a “satisfying crunch” from the produce and airy softness from the bread every time.
  • Interactive Eating: It turns a standard meal into a “fun activity.” Kids love the tactile experience of “munching and sliding” their way through lunch.
  • Versatile Fillings: You can use whatever you have in the fridge—turkey, ham, cheese cubes, or even leftover Kentucky Hot Brown ingredients.
  • Mess-Proof Portions: Perfect for little hands to manage without the fillings falling out the back of a traditional sandwich.

What You’ll Need

  • Bread Cubes: Use a sturdy sourdough, whole wheat, or even toasted Brown Rice Cakes cut into squares.
  • Deli Meats: Folded squares of turkey, roast beef, or ham.
  • Cheese Cubes: Sharp cheddar, mozzarella, or Monterey Jack.
  • Crunchy Veggies: Cucumber rounds, cherry tomatoes, and bell pepper chunks.
  • The “Stick”: Bamboo skewers (with the sharp points trimmed for younger kids) or reusable plastic picks.
  • The Dip: A small container of hummus, pesto, or honey mustard on the side.

How to Make It

  1. The Prep: Cut your bread, cheese, and vegetables into uniform, bite-sized cubes or rounds.
  2. The Meat Fold: Fold your deli meat into small “ribbons” or squares so they stay securely on the stick.
  3. The Assembly: Slide the ingredients onto the skewer in a “visually appealing” pattern.Pro Tip: Start and end with a cube of bread or a sturdy veggie like a cucumber to act as an “anchor” so nothing slides off!
  4. The Pattern: Alternate colors and textures—bread, turkey, cheese, tomato, cucumber—to keep it interesting.
  5. The Side: Pack a small dipping cup of your favorite spread separately to keep the “kabob” dry and crisp.

Get the Kids Involved: The “Kabob Creators”

This is a “ton of fun” for kids and helps them take ownership of their lunch box.

  • Ages 3–5: Let them be the “Pattern Pickers.” They can decide the order of the ingredients (e.g., “Red, White, Green!”) while you handle the actual skewering.
  • Ages 6–9: Have them help “The Ingredient Cubers.” Using a kid-safe nylon knife, they can help chop the cheese and cucumbers into the perfect squares.
  • Ages 10+: Let them lead the “Flavor Experiment.” Challenge them to make a “Taco Kabob” with cheddar, turkey, and bell peppers, or a “Caprese Kabob” with mozzarella and tomatoes.

Tips for Success

  • Safety First: For younger children, you can use blunt-ended coffee stirrers or plastic “bento” picks instead of sharp bamboo skewers.
  • Dip, Don’t Spread: Since the “spread” isn’t on the bread, the dip is the star! Try a side of the luscious hummus used in the Veggie Salad Sandwich.
  • Fruit Fusion: Don’t be afraid to add a grape or a cube of melon for a “sweet yet tart” surprise in the middle of the savory kabob.
  • Lunchbox Logic: These fit perfectly in rectangular containers. Place a folded napkin at the bottom to catch any moisture from the tomatoes and keep the bread “airy and light.”

Serve & Savor

Sandwich Kabobs are a “tantalizing taste sensation” that proves everything is just better when it comes on a stick. It’s a “wholesome” win that turns a routine lunch into a “holiday-level” celebration of fresh ingredients.

Print
clockclock iconcutlerycutlery iconflagflag iconfolderfolder iconinstagraminstagram iconpinterestpinterest iconfacebookfacebook iconprintprint iconsquaressquares iconheartheart iconheart solidheart solid icon

Sandwich-on-a-Stick

5 Stars 4 Stars 3 Stars 2 Stars 1 Star

No reviews

A fun, portable twist on the classic sandwich—perfect for kids, parties, or quick snacks. No slicing, no mess—just stack, skewer, and enjoy.

Ingredients

Scale
  • 2 cups bread, cubed (ciabatta, French, or other hearty bread)
  • 1 1/2 cups cubed mozzarella and cheddar cheese
  • 1 slice thick-cut deli ham, cut into strips or cubes
  • 10 cherry tomatoes
  • 10 skewers

Other foods that work great on a stick:

  • Sliced or cubed turkey or roast beef
  • Cucumbers
  • Swiss cheese

Instructions

1. Assemble the Skewers

  • On each skewer, layer in this order:
    • 1 cube bread
    • 1 cube cheddar cheese
    • 1 piece ham
    • 1 cherry tomato
    • 1 piece ham
    • 1 cube mozzarella cheese
    • 1 cube bread

2. Repeat

  • Continue assembling until all skewers and ingredients are used.

3. Serve

  • Serve immediately with mustard or your preferred dipping sauce.

Notes

  • Use sturdy bread: Prevents tearing when skewering
  • Cut evenly: Keeps skewers balanced and visually appealing
  • Secure gently: Avoid overpacking to prevent splitting ingredients

Want To save this Recipe?

Picture of One Potato

One Potato

One Potato is a community and newsletter written by real people who are parents, having real conversations about our families, cooking traditions, and cultures.

Healthy New Year Recipe

Subscribe Here

Want to be a guest writer ?

Check out our Community Voices Info Page, and get in touch.

Advertise with Us

One Potato is a community and newsletter written by real people who are parents, having real conversations about our families, cooking traditions, and cultures. We are passionate about raising healthy and happy kids while navigating the challenges of picky eaters, dietary restrictions, busy schedules, and daily life.