The “Nutritious & Grab-and-Go” Homemade Protein Bars
When you’re tasked with rushing everyone out the door for a healthy, “additive-free” morning boost, sometimes the best solution is to skip the sugar-laden store-bought boxes entirely. These Homemade Protein Bars use simple, organic ingredients to create a bakery-worthy snack right at home. It’s a “wholesome” twist that had the in-house testers absolutely thrilled—to the point where one could barely hear a muffled “pass another bar please” through bites of chewy, nutty goodness!
Why This Recipe Wins
- Protein-Packed Power: By incorporating organic, nutrient-dense ingredients into a clean recipe, the dish provides a “filling and tasty” fuel boost for busy mornings.
- Morning Rush Surprise: Moving away from a “standard tedious routine” of processed packaged bars makes an on-the-go breakfast feel like a “special holiday” treat.
- Naturally Clean: Skipping hidden sugars and artificial additives provides a “rich yet robust” flavor profile using minimal pantry staples.
- Batch-Prep Ease: These “grab-and-go portions” make a batch of 16 bars that stay fresh for weeks, making them an ideal choice for effortless school snack prep.
What You’ll Need
- The Protein Binder: Nutritious nut butter (or seed butter) to bind the bars and deliver healthy fats and protein.
- The Wholesome Core: Whole grains, seeds, or organic protein base for a satisfying, fibrous chew.
- The Subtle Sweetener: A light touch of honey or maple syrup to keep refined sugars out.
- The Fun Mix-ins: Mini chocolate chips, dried fruit, or shredded coconut for a flavor boost.
How to Make It
- The Wet Blend: Combine the nut butter and natural sweetener in a bowl, stirring until completely “velvety smooth.”
- The Dough Mix: Fold in your protein base and organic mix-ins, stirring “thoroughly, but gently” until a thick dough forms.
- The Pan Press: Press the mixture firmly into a parchment-lined baking pan so the top is flat and the edges stay “perfectly crisp.”
- The Chill: Refrigerate the pan until set, allowing the ingredients to firm up so they hold their shape cleanly.
- The Slice: Slice the slab cleanly into 16 uniform bars until they look rich and slightly “golden-brown” in tone.
- The Pack: Wrap individually or store in snack bags for a convenient, “mess-proof” masterpiece!
Get the Kids Involved: The “Bar Boss Crew”
Since measuring and pressing dough into a pan is super tactile, this is a “ton of fun” for kids to help assemble and enjoy.
- Ages 3–5: Let them be the “Mix-in Dumpers.” They can help pour dried fruit or seeds into the mixing bowl, practicing their “precision.”
- Ages 6–9: Have them help as “The Dough Pressers.” Show them how pressing the mixture tightly into the pan creates a “scrumptious” and dense texture.
- Ages 10+: Let them lead the “Wrapping Station.” Under supervision, they can slice the chilled slab into 16 individual bars and wrap them for the week ahead.
Tips for Success
- Firm Pressing is Crucial: If you don’t compact the mixture tightly into the pan before chilling, the bars may crumble when sliced. Pressing down firmly is imperative to achieve that “tender and rich” chewy texture.
- Batch Prep Matters: The goal is stress-free mornings, so making all 16 bars at once ensures school snacks remain “refreshing and light” and ready at a moment’s notice.
- The Long-Fresh Trick: One can keep a batch of these bars stored in the fridge for weeks without losing flavor or texture.
Snack Note: Suitable for kids over age 1 without nut allergies! Wrap individual bars in wax paper or place in snack bags for a “quick and easy” treat on the way to school or sports practice.
- Variation: For a “decadent and indulgent” twist, drizzle melted dark chocolate over the chilled top, or swap nut butter for sunflower seed butter to make a 100% nut-free version for school safety.
Serve & Savor
The Homemade Protein Bars are a “tantalizing taste sensation” that proves simple, low-ingredient snacks can be “out of this world” delicious. It’s a “versatile” recipe that turns wholesome pantry staples into a “memory-making” family favorite.
Protein Bars
5 Stars 4 Stars 3 Stars 2 Stars 1 Star
No reviews
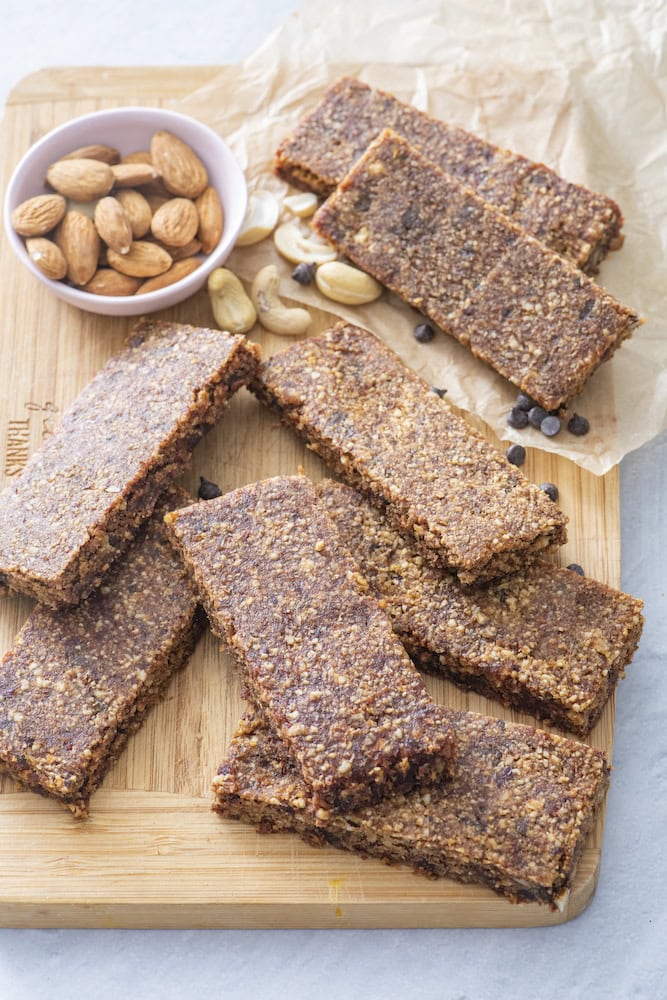
These homemade Protein Bars are chewy, nutty, and naturally sweet from dates and dried fruit. They’re easy to make in a big batch and keep on hand for breakfasts, lunchboxes, or afternoon snacks.
The simple ingredient list also makes them easy to customize with what your family likes.
Ingredients
- 1 cup raw, unsalted cashews
- 1 cup raw, unsalted almonds
- 1/2 cup dried cranberries or chocolate chips
- 2 1/4 cups dates, about 20
- 3/4 cup rolled oats
- 1 tablespoon vanilla extract
- 1 tablespoon honey or agave
Instructions
- Preheat the oven to 170°F, or use the lowest setting on your oven and adjust the cooking time as needed.
- Place the cashews and almonds in a bowl and cover with cool water. Soak for 1 hour.
- Place the dates in a separate bowl and cover with hot water. Soak for 30 minutes. Drain and remove the pits.
- Place the oats in a food processor and pulse until finely ground. Transfer to a large bowl.
- Drain the nuts and pat them dry with a clean towel.
- Place the nuts and dried cranberries or chocolate chips in the food processor. Pulse until the nuts are broken into small pieces. Uneven pieces are fine.
- Transfer the nut mixture to the bowl with the oats.
- Place the dates, vanilla, and honey or agave in the food processor. Pulse until smooth and paste-like.
- Add the date mixture to the oat and nut mixture. Stir until thoroughly combined. The mixture will be thick and sticky.
- Transfer the mixture to a parchment-lined or silicone-lined baking sheet.
- Shape it into an even rectangle about 8 x 10 inches and 1/2 inch thick.
- Bake for 4 1/2–5 hours, or until firm but not hard. If your oven’s lowest setting is 200°F, bake for about 4 hours.
- Cool completely, then cut into bars and wrap individually.
Notes
- Keep the mixture even: Press the mixture firmly into an even rectangle so the bars dry at the same rate.
- Don’t overprocess the nuts: Small pieces give the bars a pleasant texture. You don’t want nut butter.
- Oven temperatures vary: The goal is to dry and firm the mixture, not brown it.
- Dehydrator option: Dehydrate at 135°F for 6–8 hours, or until the bars reach your preferred texture.
- Allergy-friendly swaps: If needed, replace the nuts with seeds such as sunflower or pumpkin seeds.
- Author: Miks