" "

Baked Halloween Tortilla Chips

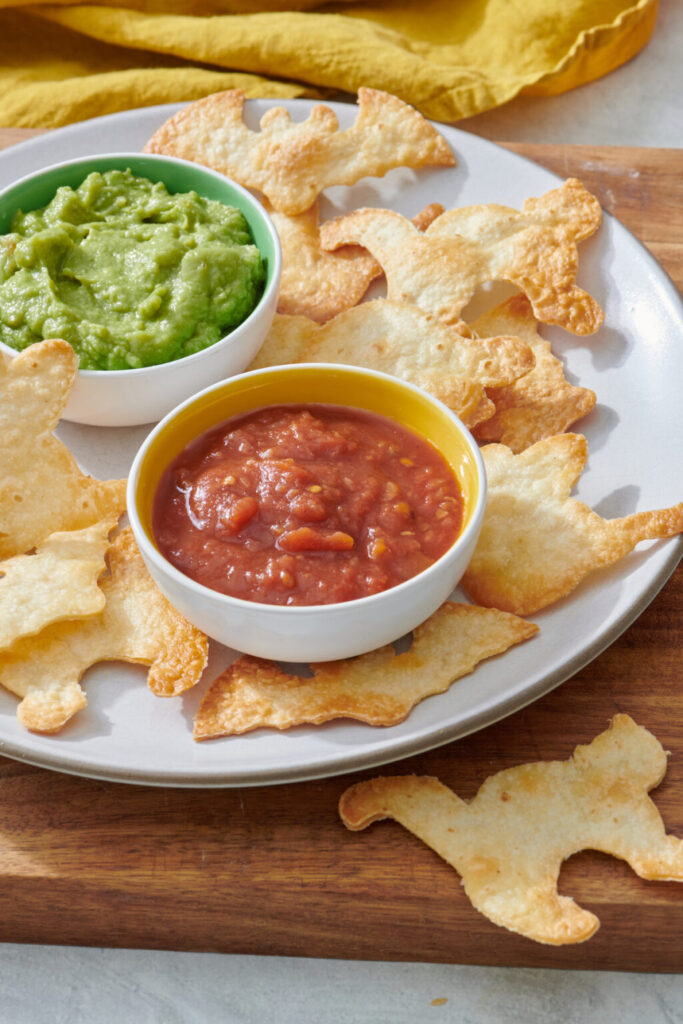
Baked Halloween Tortilla Chips turn everyday tortillas into crispy, spooky-shaped snacks perfect for Halloween parties, festive dips, and family fun.

The “Spooky & Creative” Baked Halloween Tortilla Chips

When you’re tasked with whipping up a fun snack for a healthy, “Halloween-loving” family, sometimes the best solution is transforming everyday tortillas into festive shapes. These Baked Halloween Tortilla Chips use simple flour tortillas and cookie cutters to create an interactive, crispy treat right at home. It’s a “wholesome” twist that had the in-house testers absolutely thrilled—to the point where one could barely hear a muffled “pass another bat” through bites of crunchy, ghoulish goodness!

Spooky Snacks & Party Appetizers

Why This Recipe Wins

  • Creative Power: By cutting everyday flour tortillas into fun shapes, the dish provides a “filling and tasty” base that you can completely customize to suit your own spooky vision.
  • Party Surprise: Moving away from a “standard tedious routine” of plain bagged chips turns a regular snack time into a “special holiday” event where kids can unleash their creativity.
  • Naturally Crispy: Baking them fresh from the oven provides a “rich yet robust” flavor profile that guarantees a perfect crunch and freshness every single time.
  • Interactive Ease: These “kid-approved portions” are a fun, hands-on way to involve the whole family from start to finish, making it an ideal choice for movie nights or Halloween parties.

What You’ll Need

  • The Spooky Canvas: Flour tortillas (regular or whole wheat work beautifully depending on your preference).
  • The Creative Tools: Halloween-themed cookie cutters (think bats, pumpkins, ghosts, or witches!).
  • The Crispy Binder: Cooking spray or a brush of olive oil to help the seasoning stick.
  • The Signature Flavor: Your choice of seasoning (sea salt, smoked paprika, chili powder, or garlic powder all work well).

How to Make It

  • The Spooky Cut-Out: Lay your tortillas flat on a clean surface and use the themed cookie cutters to press out fun shapes, ensuring they aren’t “perfectly crisp” and dry before baking.
  • The Oil Coat: Place the shapes on a parchment-lined baking sheet and lightly coat them with cooking spray or brush “thoroughly, but gently” with olive oil so they look completely “velvety smooth.”
  • The Flavor Sprinkle: Sprinkle sea salt or your chosen spooky seasoning evenly over the shapes.
  • The Bake: Pop the baking sheet into a 350°F oven for 7–10 minutes until the edges take on a gorgeous “golden-brown” finish and become delightfully crispy.
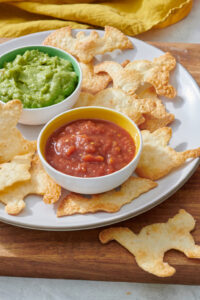
  • The Plate: Let them cool for a few minutes for maximum crispiness, then serve with vibrant guacamole or salsa for a fun, “mess-proof” masterpiece!

Get the Kids Involved: The “Spooky Squad”

Since cutting shapes and sprinkling seasonings is super interactive, this is a “ton of fun” for kids to help assemble and enjoy.

  • Ages 3–5: Let them be the “Seasoning Sprinklers.” They can help scatter the sea salt or paprika over the oiled tortillas, practicing their “precision.”
  • Ages 6–9: Have them help as “The Cookie Cutters.” Show them how pressing the bat and pumpkin shapes into the tortillas creates a “scrumptious” and spooky canvas.
  • Ages 10+: Let them lead the “Oil Brushing & Baking.” Under supervision, they can lightly brush the tortillas and look for the “magic crunch” as the chips bake perfectly in the oven.

Tips for Success

  • Watch the Oven: If you leave them in too long, the thin tortillas will burn quickly. Keeping a close eye on the chips is imperative to achieve that “tender and rich” bite with an undeniably perfect crunch.
  • Cool for Crispiness: The goal is maximum crunch, so letting them rest on the baking sheet for a few minutes after baking ensures the snack stays “refreshing and light” rather than chewy.
  • The Party Trick: One can make a “huge batch” of these by utilizing every inch of the tortillas, saving the leftover odd-shaped scraps to bake as extra crunchy salad or soup toppers!

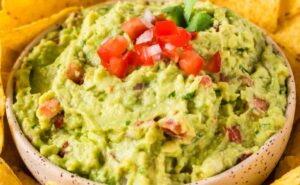
Halloween Note: Pair these with fun dips! Serving them alongside a Spiderweb Taco Dip, Monster Mash Guacamole, or Pumpkin Patch Queso makes hosting a party a “quick and easy” win that guests will absolutely devour.

  • Variation: For a “decadent and indulgent” twist, make them sweet by brushing with melted butter and sprinkling with a blend of cinnamon and sugar before baking, or use colorful spinach, beet, or sun-dried tomato tortillas to elevate the vibrant Halloween vibe even further.

Serve & Savor

The Baked Halloween Tortilla Chips are a “tantalizing taste sensation” that proves DIY holiday snacks can be “out of this world” fun and flavorful. It’s a “versatile” recipe that turns humble tortillas into a “memory-making” family favorite.

Print
clockclock iconcutlerycutlery iconflagflag iconfolderfolder iconinstagraminstagram iconpinterestpinterest iconfacebookfacebook iconprintprint iconsquaressquares iconheartheart iconheart solidheart solid icon

Baked Halloween Tortilla Chips

5 Stars 4 Stars 3 Stars 2 Stars 1 Star

No reviews

Baked Halloween Tortilla Chips turn everyday tortillas into crispy, spooky-shaped snacks perfect for Halloween parties, festive dips, and family fun.

Ingredients

  • Flour tortillas, as needed

  • Cooking spray or olive oil

  • Salt or your favorite seasoning

Instructions

  1. Preheat the Oven: Preheat the oven to 350°F.

  2. Cut the Shapes: Lay the tortillas flat on a clean surface. Use Halloween-themed cookie cutters to cut out shapes such as bats, pumpkins, ghosts, or stars.

  3. Arrange the Chips: Place the tortilla shapes in a single layer on a parchment-lined baking sheet or silicone baking mat.

  4. Add Oil and Seasoning: Lightly coat the shapes with cooking spray or brush with a small amount of olive oil. Sprinkle with salt or your preferred seasoning.

  5. Bake Until Crispy: Bake for 10–12 minutes, watching closely to prevent over-browning. Remove when the chips are golden and crisp.

  6. Cool and Serve: Let the chips cool for a few minutes so they can crisp further. Serve with your favorite dip or enjoy them on their own.

Notes

  • Cut efficiently: Arrange the cookie cutters close together to get more shapes from each tortilla.

  • Bake in a single layer: Avoid overlapping the chips so they crisp evenly.

  • Watch the edges: Smaller shapes may bake faster, so check them before the full cooking time is up.

  • Let them cool: The chips become crisper as they cool.

  • Save the scraps: Cut leftover tortilla pieces into triangles and bake them alongside the Halloween shapes.


Want To save this Recipe?

Picture of One Potato

One Potato

One Potato is a community and newsletter written by real people who are parents, having real conversations about our families, cooking traditions, and cultures.

Latest Recipes

Subscribe Here

Want to be a guest writer ?

Check out our Community Voices Info Page, and get in touch.

Advertise with Us

One Potato is a community and newsletter written by real people who are parents, having real conversations about our families, cooking traditions, and cultures. We are passionate about raising healthy and happy kids while navigating the challenges of picky eaters, dietary restrictions, busy schedules, and daily life.