" "

Coconut Baked Shrimp

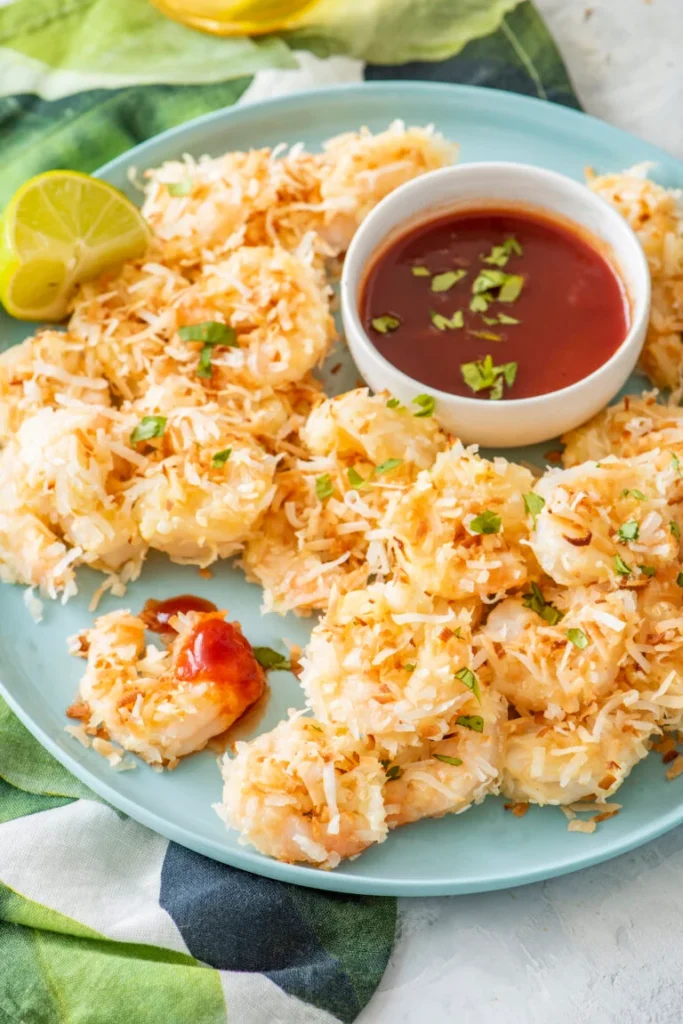
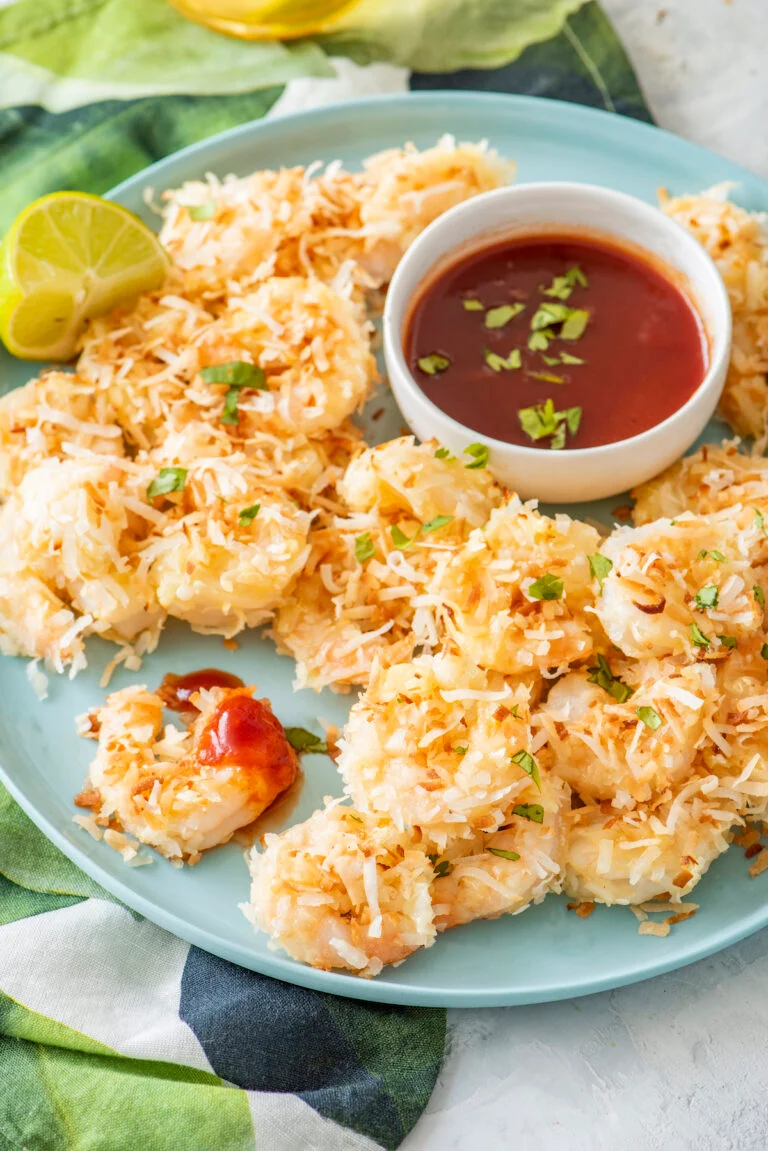
Crispy coconut-coated shrimp baked until golden and served with sweet-and-sour dipping sauce for a fun, family-friendly meal.
Coconut baked shrimp on a plate with a bowl of dipping sauce

The “Crispy & Juicy” Baked Coconut Shrimp

When you’re tasked with whipping up a fun appetizer or dinner for a healthy, “seafood-loving” family, sometimes the best solution is recreating a beloved restaurant classic right at home. These Baked Coconut Shrimp use sweet, tender shrimp and shredded coconut to create a healthy, broiled version of a deep-fried NYC favorite. It’s a “wholesome” twist that had the in-house testers absolutely thrilled—to the point where one could barely hear a muffled “pass another shrimp” through bites of crispy, juicy goodness!

Why This Recipe Wins

  • Protein Power: By incorporating sweet, tender shrimp baked with a crispy outer shell, the dish provides a “filling and tasty” alternative to heavy, deep-fried restaurant appetizers.
  • Dinner Surprise: Moving away from a “standard tedious routine” of plain fish sticks turns a quick 20-minute meal into a “special holiday” event where kids have fun dipping their dinner.
  • Naturally Crispy: Baking or air-frying the shredded coconut coating provides a “rich yet robust” flavor profile that perfectly recreates those special food memories from NYC.
  • 20-Minute Ease: These “kid-approved portions” are incredibly fast to prep and cook, making them an ideal choice for a healthy weeknight dinner entree or a weekend party snack.

What You’ll Need

  • The Tender Seafood: Peeled and deveined shrimp (frozen works perfectly—just thaw them in cold water for 30 minutes!).
  • The Base Coat: All-purpose flour (or almond flour for a gluten-free swap) to help the breading stick.
  • The Sticky Binder: Whisked eggs (or buttermilk) to hold that delicious crust in place.
  • The Crispy Shell: Shredded unsweetened coconut for that ultimate crunchiness and flavor.
  • The Dipping Magic: The ingredients for an easy, kid-friendly sweet and sour sauce to serve on the side.

How to Make It

  • The Shrimp Prep: Pat the shrimp dry with a paper towel and sprinkle with salt so they are primed to hold the breading and the moisture doesn’t keep the crust from getting “perfectly crisp.”
  • The Assembly Line: Arrange three separate bowls for the flour, whisked eggs, and shredded coconut so the breading station runs completely “velvety smooth.”
  • The Breading Dip: Lightly coat the shrimp in flour, dip in the egg, and roll in the shredded coconut, pressing “thoroughly, but gently” to ensure the crispy shell adheres.
  • The Broil (or Air Fry): Place the shrimp on a greased baking rack, spray lightly with cooking oil, and broil (or air fry at 400°F) until the outside takes on a gorgeous “golden-brown” finish.
  • The Plate: Serve warm alongside the sweet and sour dipping sauce for a satisfying, “mess-proof” masterpiece!

Get the Kids Involved: The “Shrimp Squad”

Since rolling breading and mixing sauces is super interactive, this is a “ton of fun” for kids to help assemble and enjoy.

  • Ages 3–5: Let them be the “Coconut Rollers.” They can help gently roll the egg-coated shrimp into the shredded coconut bowl, practicing their “precision.”
  • Ages 6–9: Have them help as “The Egg Whiskers.” Show them how whisking the eggs in the breading station creates a “scrumptious” and sticky binder for the crust.
  • Ages 10+: Let them lead the “Breading Assembly.” Under supervision, they can manage the flour-egg-coconut line and look for the “magic crunch” as the shrimp broil in the oven.

Tips for Success

  • Drying is Crucial: If you don’t pat the shrimp dry, the breading will slide right off. Removing excess moisture is imperative to achieve that “tender and rich” bite with an undeniably crispy shell.
  • Reheat with Care: The goal is maintaining that crunch, so reheating gradually in a 300°F oven or air fryer ensures the exterior stays “refreshing and light” while the inside doesn’t get chewy or tough.
  • The Freezer Trick: One can make a “huge batch” of these to store in an airtight container in the freezer for up to 6 months of incredibly quick appetizers!

Appetizer Note: Share a special food memory with your kids! Serving these with a side of sweet and sour dipping sauce makes introducing seafood a “quick and easy” win that takes the meal to another planet.

  • Variation: For a “decadent and indulgent” twist, swap the all-purpose flour for almond flour for a gluten-free feast, or serve alongside a zippy fresh mango salsa to elevate the flavor profile even further.

Serve & Savor

The Baked Coconut Shrimp are a “tantalizing taste sensation” that proves healthy, baked appetizers can be “out of this world” delicious. It’s a “versatile” recipe that turns simple shrimp and shredded coconut into a “memory-making” family favorite.

Print
clockclock iconcutlerycutlery iconflagflag iconfolderfolder iconinstagraminstagram iconpinterestpinterest iconfacebookfacebook iconprintprint iconsquaressquares iconheartheart iconheart solidheart solid icon
Coconut baked shrimp on a plate with a bowl of dipping sauce

Coconut Baked Shrimp

5 Stars 4 Stars 3 Stars 2 Stars 1 Star

No reviews

Crispy coconut-coated shrimp baked until golden and served with sweet-and-sour dipping sauce for a fun, family-friendly meal.

  • Total Time: 30 minutes
  • Yield: 4 servings

Ingredients

  • Raw shrimp, peeled and deveined, tails on or off

  • Shredded coconut

  • Breadcrumbs or panko

  • Eggs, beaten

  • All-purpose flour

  • Salt and black pepper, to taste

  • Cooking spray or oil, for the baking sheet

Sweet-and-Sour Dipping Sauce

Use your favorite prepared sweet-and-sour sauce, or serve with a homemade version.

Instructions

  1. Preheat the oven. Heat the oven to 400°F and line a baking sheet with parchment paper or lightly grease it.

  2. Prepare the coating station. Place flour in one shallow bowl, beaten eggs in a second, and a mixture of shredded coconut and breadcrumbs in a third. Season the flour lightly with salt and pepper.

  3. Coat the shrimp. Pat the shrimp dry. Dip each shrimp in flour, then egg, and finally the coconut-breadcrumb mixture, pressing gently so the coating sticks.

  4. Arrange on the baking sheet. Place the coated shrimp in a single layer with space between each piece. Lightly spray the tops with cooking spray or drizzle with a little oil to encourage browning.

  5. Bake until golden. Bake for about 10–15 minutes, depending on shrimp size, turning halfway if needed. Cook until the coating is golden and the shrimp are opaque and reach 145°F internally.

  6. Prepare the sauce. Place the sweet-and-sour dipping sauce in a small serving bowl.

  7. Serve immediately. Enjoy the shrimp while the coconut coating is crisp, with the sauce on the side.

Notes

  • Dry the shrimp well: Excess moisture can prevent the coating from sticking.

  • Keep one hand dry: Use one hand for the flour and coconut mixture and the other for the egg to reduce clumping.

  • Leave space on the tray: Crowding can cause the shrimp to steam rather than crisp.

  • Watch the coconut: Coconut browns quickly, so check the shrimp near the end of cooking.

  • Author: Miks
  • Prep Time: 15 minutes
  • Cook Time: 15 minutes
  • Category: Main Dish
  • Cuisine: American

Want To save this Recipe?

Picture of One Potato

One Potato

One Potato is a community and newsletter written by real people who are parents, having real conversations about our families, cooking traditions, and cultures.

Latest Recipes

Subscribe Here

Want to be a guest writer ?

Check out our Community Voices Info Page, and get in touch.

Advertise with Us

One Potato is a community and newsletter written by real people who are parents, having real conversations about our families, cooking traditions, and cultures. We are passionate about raising healthy and happy kids while navigating the challenges of picky eaters, dietary restrictions, busy schedules, and daily life.