" "

Pizza Mummies

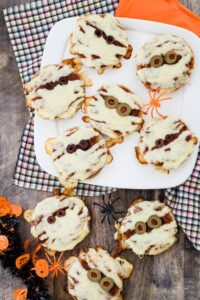
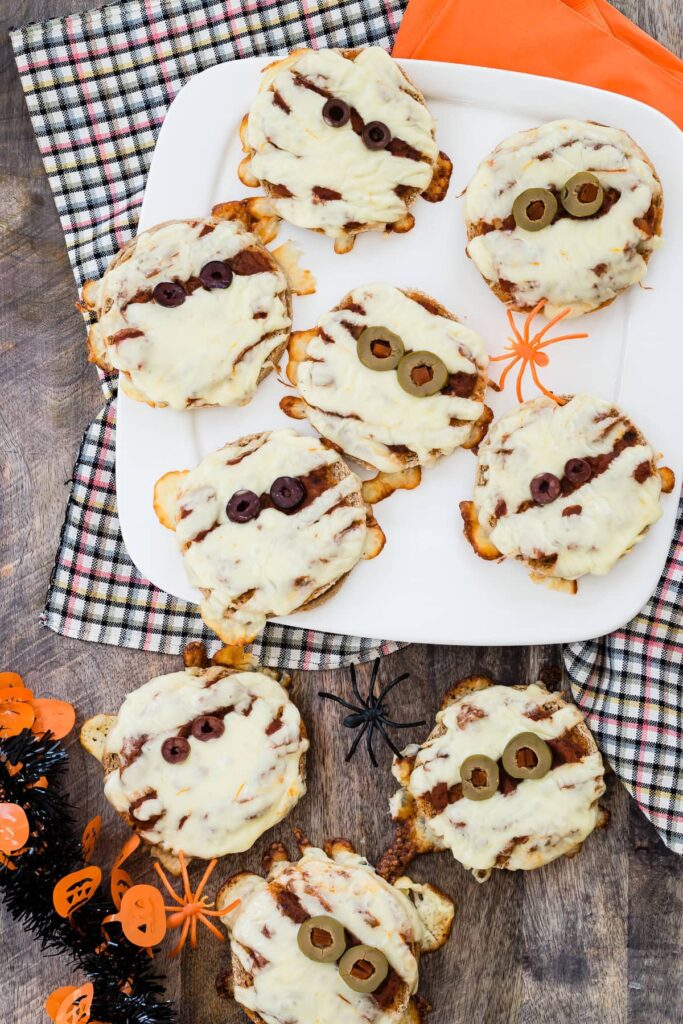
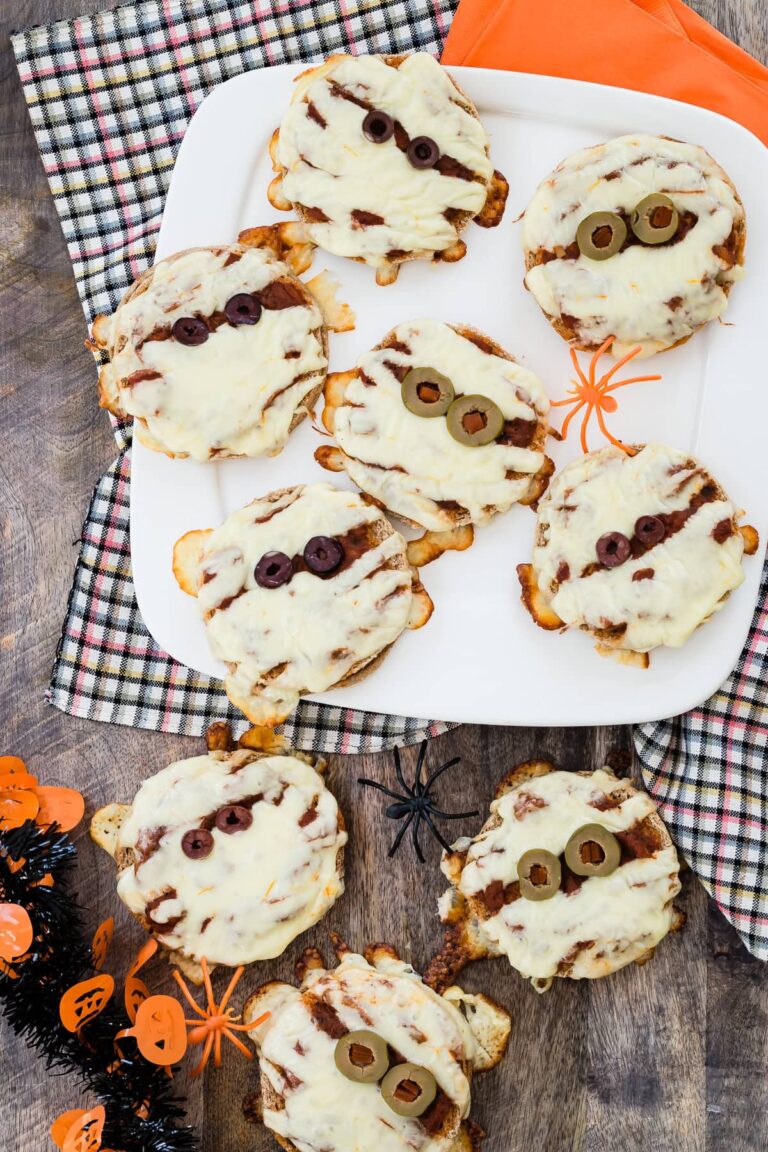
Pizza Mummies turn English muffins, pizza sauce, mozzarella, and olive eyes into adorable Halloween mini pizzas that are easy to prep ahead and bake before trick-or-treating.

The “Spooky & Cheesy” Pizza Mummies

When you’re tasked with whipping up a quick Halloween dinner for a healthy, “pizza-loving” family, sometimes the best solution is turning a simple English muffin into a spooky masterpiece. These Pizza Mummies use hearty English muffin halves, tangy pizza sauce, and string cheese to create an adorable, savory bite right at home. It’s a “wholesome” twist that had the in-house testers absolutely thrilled—to the point where one could barely hear a muffled “pass another mummy” through bites of warm, cheesy goodness!

Why This Recipe Wins

  • Savory Power: By layering savory pizza sauce and cheese on a toasted English muffin, the dish provides a “filling and tasty” real meal that fills their bellies before the trick-or-treat candy rush.
  • Dinner Surprise: Moving away from a “standard tedious routine” of plain weeknight dinners turns Halloween night into a “special holiday” event packed with festive magic.
  • Naturally Tangy & Cheesy: Balancing the bright, tangy tomato sauce with creamy mozzarella string cheese provides a “rich yet robust” flavor profile that kids absolutely adore.
  • Quick Assembly Ease: These “kid-approved portions” are super quick to make, which is essential when you’re juggling costumes, face paint, and Halloween chaos!

What You’ll Need

  • The Hearty Base: English muffins (split into halves, making the perfect mini pizza canvas).
  • The Tangy Sauce: Your favorite pizza sauce to provide that classic, delicious flavor.
  • The Mummy Bandages: Mozzarella cheese sticks (peeled into thin strings for easy mummifying!).
  • The Spooky Eyes: Green olives with pimentos (sliced into rings to create creepy, staring eyes).

How to Make It

  • The Base Toast: Place the English muffin halves on a baking sheet and bake at 400℉ for 5 minutes so they don’t remain soft and soggy, but instead toast up to be “perfectly crisp” and sturdy.
  • The Sauce Spread: Remove from the oven and spread 1 tablespoon of pizza sauce onto each half, smoothing it “thoroughly, but gently” until the tangy layer looks completely “velvety smooth.”
  • The Mummification: Peel the mozzarella sticks into strings and decoratively arrange them across the sauce like mummy bandages, then place the sliced olive rings on top for the eyes.
  • The Bake: Bake the mummies for 3 to 5 minutes until the cheese melts and takes on a gorgeously toasted, slightly “golden-brown” finish.
  • The Plate: Let them cool slightly before serving for a fun, “mess-proof” masterpiece!

Get the Kids Involved: The “Mummy Squad”

Since peeling cheese and placing olive eyes is super interactive, this is a “ton of fun” for kids to help assemble and enjoy.

  • Ages 3–5: Let them be the “Eye Placers.” They can help drop the sliced green olives right onto the cheese bandages, practicing their “precision.”
  • Ages 6–9: Have them help as “The Cheese Peelers.” Show them how pulling the mozzarella sticks into thin strings creates a “scrumptious” and realistic mummy wrap.
  • Ages 10+: Let them lead the “Sauce Spreading & Baking.” Under supervision, they can spread the sauce over the toasted muffins and look for the “magic melt” as the cheese bandages bubble perfectly in the oven.

Tips for Success

  • Use Full-Fat Cheese: If you use fat-free cheese, it won’t melt nicely in the oven. Using standard full-fat string cheese is imperative to achieve that “tender and rich” stretch when you take a bite.
  • Don’t Over-Sauce: The goal is a sturdy mini pizza, so keeping the sauce to just one tablespoon per half ensures the muffin stays “refreshing and light” rather than turning into a soggy mess.
  • The Prep Ahead Trick: One can make a “huge batch” of these early in the day, covering them loosely on a plate in the fridge so you can simply pop them in the oven right before it’s time to trick-or-treat!

Halloween Note: Serve a real meal first! Getting a savory, fun dinner on the table before the sugar rush hits makes surviving the night a “quick and easy” win that sets a great tone for the evening.

  • Variation: For a “decadent and indulgent” twist, tuck mini pepperonis or sautéed bell peppers underneath the cheese bandages, or sprinkle the tops with a little parmesan “mummy dust” to elevate the festive flavor even further.

Serve & Savor

The Pizza Mummies are a “tantalizing taste sensation” that proves festive holiday dinners can be “out of this world” simple and creative. It’s a “versatile” recipe that turns everyday English muffins into a “memory-making” family favorite.

Print
clockclock iconcutlerycutlery iconflagflag iconfolderfolder iconinstagraminstagram iconpinterestpinterest iconfacebookfacebook iconprintprint iconsquaressquares iconheartheart iconheart solidheart solid icon

Pizza Mummies

5 Stars 4 Stars 3 Stars 2 Stars 1 Star

No reviews

Pizza Mummies turn English muffins, gooey mozzarella, and olive eyes into adorable Halloween mini pizzas perfect for a quick family snack.

Ingredients

Scale


  • 2 English muffins, split in half

  • ¼ cup pizza sauce or marinara sauce

  • 2 mozzarella cheese sticks

  • 3 green olives with pimentos

Instructions

1. Preheat the Oven

Preheat the oven to 400°F. Arrange the English muffin halves on a baking sheet, cut side up.

2. Toast the Muffins

Bake the muffin halves for 5 minutes to lightly toast them. Remove the baking sheet from the oven.

3. Add the Pizza Sauce

Spread 1 tablespoon of pizza or marinara sauce over each English muffin half, covering the cut surface.

4. Create the Mummy Bandages

Peel the mozzarella cheese sticks into thin strings. Arrange the cheese strips across each muffin in overlapping layers, leaving small gaps for the mummy’s eyes.

Slice the green olives into rings and place two rings on each mini pizza to create eyes.

5. Bake Until Melty

Return the pizzas to the oven and bake for 3–5 minutes, until the cheese melts. Let them cool slightly before serving.

Notes


  • Peel the cheese into thin strips: Thinner pieces are easier to arrange and create a classic wrapped-mummy look.

  • Leave gaps for the eyes: Position the olive rings before adding the final cheese strips so the faces stay visible.

  • Toast the muffins first: This helps keep the bases from becoming soggy under the sauce.

  • Use full-fat mozzarella: It generally melts more smoothly than reduced-fat varieties.

  • Customize the faces: Add bell pepper strips for mouths or use small pieces of black olive for extra spooky expressions.
Want To save this Recipe?

Picture of One Potato

One Potato

One Potato is a community and newsletter written by real people who are parents, having real conversations about our families, cooking traditions, and cultures.

Latest Recipes

Subscribe Here

Want to be a guest writer ?

Check out our Community Voices Info Page, and get in touch.

Advertise with Us

One Potato is a community and newsletter written by real people who are parents, having real conversations about our families, cooking traditions, and cultures. We are passionate about raising healthy and happy kids while navigating the challenges of picky eaters, dietary restrictions, busy schedules, and daily life.