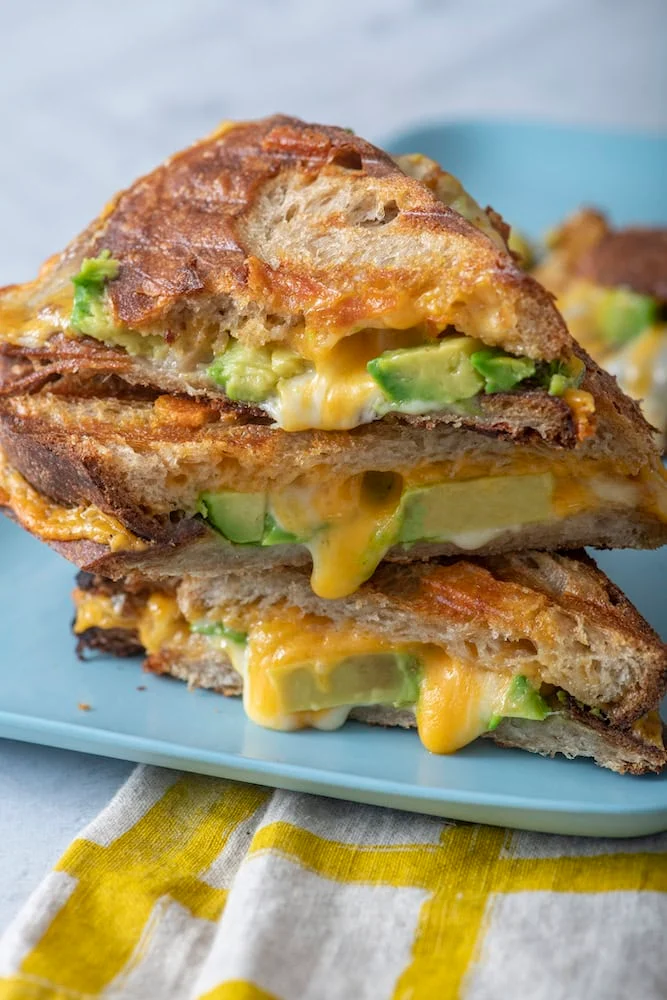
The “Crispy & Gooey” Grilled Cheese with Avocado
When you’re tasked with packing a winning lunch for a healthy, “cheese-loving” family, sometimes the best solution is elevating a nostalgic classic. This Grilled Cheese with Avocado pairs crusty artisan bread, two melty cheeses, and creamy avocado slices to create an elevated comfort sandwich right at home. It’s a “wholesome” twist that had the in-house testers absolutely thrilled—to the point where one could barely hear a muffled “pass another half” through bites of crispy, gooey goodness!
Why This Recipe Wins
- Creamy Avocado Power: By incorporating rich avocado slices directly between the cheese layers, the dish provides a “filling and tasty” boost of healthy fats that keeps afternoon hunger at bay.
- Lunchbox Surprise: Moving away from a “standard tedious routine” of basic plain sandwiches turns school lunchtime into a “special holiday” treat that kids lose their minds over.
- Naturally Melty: Layering sharp cheddar with smooth gruyere or provolone provides a “rich yet robust” double-cheese pull in every single bite.
- Meal-Prep Ease: These “kid-approved portions” come together in minutes, making them an ideal choice for stress-free weekly meal planning and quick weekday assembly.
What You’ll Need
- The Crusty Base: Your favorite really good bread (like artisan sourdough or whole wheat) to get that golden crunch.
- The Creamy Star: Ripe avocado, sliced or gently mashed to layer in the center.
- The Dynamic Cheese Duo: Slices of sharp cheddar paired with gruyere, provolone, or whatever meltable cheeses you have on hand.
- The Golden Fat: Butter or mayonnaise spread on the outside of the bread for pan-grilling.
How to Make It
- The Bread Prep: Butter one side of each bread slice so they are primed to grill and get “perfectly crisp” in the skillet.
- The Cheese Foundation: Layer a slice of your first cheese (like cheddar) onto the unbuttered side of the bread until the base looks completely covered and “velvety smooth.”
- The Avocado Layer: Fan out fresh avocado slices evenly across the cheese, pressing them “thoroughly, but gently” so they stay secure.
- The Double Cheese Melt: Top the avocado with your second slice of cheese (like gruyere or provolone) and the second piece of bread, buttered-side out.
- The Pan Sear: Grill in a skillet over medium heat for 3 to 4 minutes per side until the bread turns a gorgeous “golden-brown” and the cheeses are fully melted.
- The Plate: Slice diagonally and pack into lunchboxes or serve warm for a gooey, “mess-proof” masterpiece!
Get the Kids Involved: The “Melty Cheese Squad”
Since layering cheese and slicing soft ingredients is super interactive, this is a “ton of fun” for kids to help assemble and enjoy.
- Ages 3–5: Let them be the “Cheese Layerers.” They can help place the cheese slices onto the bread, practicing their “precision.”
- Ages 6–9: Have them help as “The Avocado Slicers.” Show them how using a kid-safe knife to slice tender avocado creates a “scrumptious” and creamy sandwich layer.
- Ages 10+: Let them lead the “Skillet Flip.” Under supervision, they can monitor the sandwich in the pan and flip it to look for the “magic melt” as the cheese bubbles.
Tips for Success
- Double Cheese is Crucial: Sandwiching the avocado between two layers of cheese keeps the slices locked in place instead of sliding out. Coating both sides is imperative to achieve that “tender and rich” gooey hold.
- Heat Control Matters: The goal is golden perfection without burning, so cooking over medium-low heat ensures the bread stays “refreshing and light” while giving the cheeses enough time to melt thoroughly.
- The Meal-Plan Trick: Planning your week’s lunches ahead avoids the dreaded noon-time hangry rush, keeping lunch prep effortless and organized.
Lunchbox Note: Wrap this grilled cheese in foil or cool slightly before placing in a lunchbox! It makes sending an exciting, homemade favorite to school a “quick and easy” win that will make your kids lose their minds.
- Variation: For a “decadent and indulgent” twist, add slices of roasted deli turkey, crispy bacon, or try a fun Pickle Grilled Cheese to elevate the flavor profile even further.
Serve & Savor
The Grilled Cheese with Avocado is a “tantalizing taste sensation” that proves simple lunchbox favorites can be “out of this world” delicious. It’s a “versatile” recipe that turns basic bread, cheese, and avocado into a “memory-making” family favorite.
Grilled Cheese Avocado Sandwich
5 Stars 4 Stars 3 Stars 2 Stars 1 Star
No reviews
Crispy, buttery bread, melty cheese, and creamy avocado make this grilled cheese a simple step up from the classic. It’s quick enough for lunch and satisfying enough for a cozy dinner.
Ingredients
-
8 slices sourdough bread
-
4 slices cheddar cheese
-
1 avocado, sliced
-
4 slices Gruyère or provolone cheese
-
4 tablespoons butter, softened
Instructions
Lightly spread one side of each slice of sourdough with softened butter.
2. Build the Sandwiches
Place a slice of bread on a plate, buttered side down.
Top with 1 slice of cheddar, half of the avocado slices, and 1 slice of Gruyère or provolone. Gently mash the avocado as you layer it so it stays in place.
Top with another slice of bread, buttered side up.
Repeat to make 4 sandwiches.
3. Cook
Preheat a panini maker or skillet over medium heat.
Cook the sandwiches for about 4 minutes, turning if using a skillet, until the bread is golden and crisp and the cheese is melted.
4. Slice and Serve
Carefully remove the sandwiches from the pan and let them rest for a minute before cutting.
Slice and serve warm.
Notes
-
Use softened butter: It spreads easily without tearing the bread.
-
Mash the avocado slightly: This helps keep it tucked inside the sandwich.
-
Keep the heat moderate: Medium heat gives the bread time to crisp while the cheese melts.
-
Don’t overfill: A balanced layer of cheese and avocado helps the sandwich hold together.

- Author: Miks