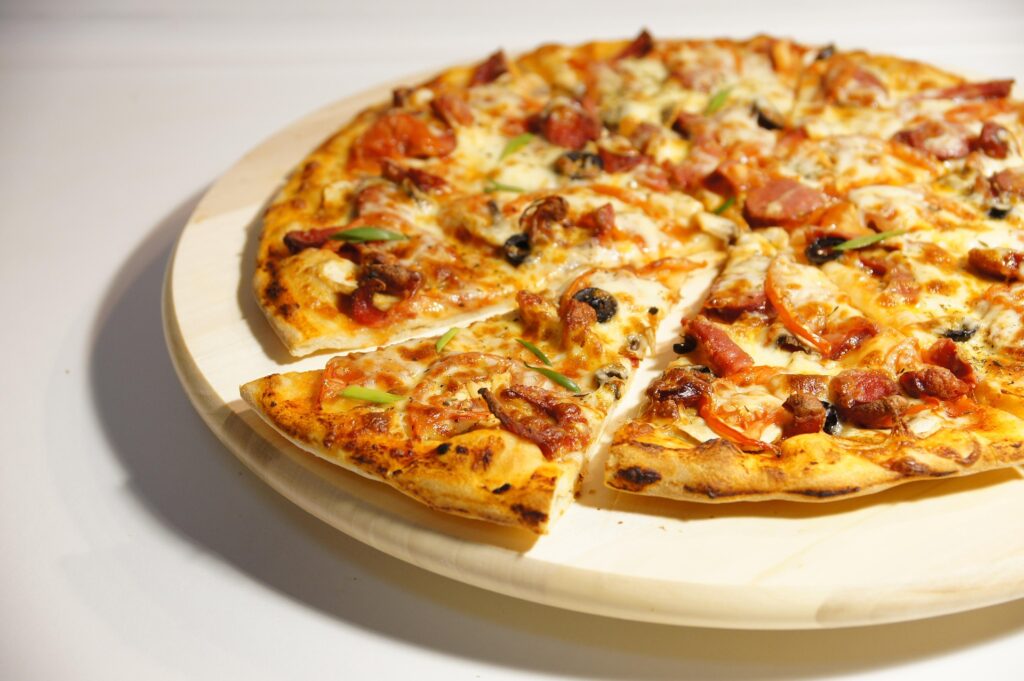
The “Light & Wholesome” Whole Wheat Pizza Dough
When you’re tasked with reinventing a classic comfort food for a healthy, “pizza-loving” family dinner, sometimes the best solution is blending wholesome whole wheat flour with all-purpose for a crust that’s both nutrient-dense and satisfyingly airy. This whole wheat pizza dough creates a light and crispy base perfect for endless topping combinations right at home. It’s a “wholesome” twist that had the in-house testers absolutely thrilled—to the point where one could barely hear a muffled “pass another slice” through bites of chewy, bubbly goodness!
Why This Recipe Wins
- Crowd-Pleasing Power: A universally loved dish that satisfies picky eaters, turning a regular dinner into a “special holiday” for the whole family.
- Nutrient-Dense yet Airy: Incorporating half whole wheat flour provides a “filling and tasty” boost of nutrition without sacrificing the light and airy texture of a classic crust.
- Freeze-and-Go Prep: Moving away from a “standard tedious routine” of delivery or frozen pizza, this dough can be made in batches and frozen, ready for an impromptu pizza night.
- Endless Customization: The dough is the “true sign” of great pizza, serving as a blank canvas for all your family’s favorite, creative topping combinations.
What You’ll Need
- The Wholesome Flour Blend: Whole wheat flour and all-purpose flour mixed 50/50 for a perfectly balanced nutritional and textural combination.
- The Rising Agent: Yeast to create a light and airy structure.
- The Essential Binder: Warm water to activate the yeast.
- The Simple Flavorings: A pinch of salt and perhaps a drizzle of olive oil.
- The Meal Base: Red sauce, pesto, mozzarella, and a variety of favorite veggies for topping variations.
How to Make It
- The Mix & Knead: Combine the flour blend, yeast, and water, kneading until the texture is perfectly smooth and “velvety smooth.”
- The Rise: Let the dough rest in a warm place until it has doubled in size, primed to create a light and airy crust.
- The Batch Prep: Divide the dough into servings. Use some immediately and freeze the rest so you have a quick meal solution “ready to be topped.”
- The Shape & Bake: Stretch the dough to your desired thickness, add favorite toppings (like red sauce and veggies, or pesto and mozzarella), and bake until the edges are “perfectly crisp” and the cheese is bubbly.
Get the Kids Involved: The “Pizza Crew”
Since stretching dough and adding toppings is super interactive, this is a “ton of fun” for kids to help assemble and enjoy.
- Ages 3–5: Let them be the “Veggie Scatterers.” They can help scatter pre-cut vegetables like red bell peppers and zucchini over their personal pizzas, practicing their “precision.”
- Ages 6–9: Have them help as “The Cheese & Pesto Artists.” Show them how drizzling pesto and dotting mozzarella creates a beautiful and “scrumptious” design.
- Ages 10+: Let them lead the “Dough Stretching.” Under supervision, they can practice stretching the dough into rustic shapes and look for the “magic bubble” as the pizzas bake.
Tips for Success
- Temperature is Crucial: Use warm (not hot) water to activate the yeast. Getting the temperature right is imperative to achieve that “tender and rich” light, airy rise.
- Batch Prep is a Game Changer: The goal is stress-free dinners, so making a double or triple batch and freezing the portions ensures a healthy, homemade alternative to processed freezer pizza is always “ready to be topped.”
- The High Heat Trick: Preheat your oven and a baking stone (or heavy sheet pan) to the maximum temperature possible. This ensures the bottom gets that professional, “perfectly crisp” texture before the toppings burn.
Lunch & Dinner Note: Make multiple variations in one sitting! You can use simple red sauce and veggies for lunch (like Kenya’s!) and a different combination, like pesto and mozzarella, for dinner. It makes serving a personalized, “mess-proof” meal a “quick and easy” win.
- Variation: For a “decadent and indulgent” twist, swap the whole wheat blend for a sourdough starter, or incorporate garlic powder and dried oregano directly into the flour mixture to elevate the flavor profile even further.
Serve & Savor
The Whole Wheat Pizza Dough is a “tantalizing taste sensation” that proves nutritious, homemade versions of comfort classics can be “out of this world” delicious. It’s a “versatile” recipe that turns universally loved pizza into a “memory-making” family favorite.
Whole Wheat Pizza Dough
5 Stars 4 Stars 3 Stars 2 Stars 1 Star
No reviews
This pizza dough combines whole wheat and all-purpose flour for a little extra whole-grain goodness while keeping the crust light, airy, and crisp. Make a batch ahead and freeze the dough rounds for an easy homemade pizza night.
Ingredients
- 1 package dry yeast
- 1⅓ cups lukewarm water
- 2 cups whole wheat flour
- 2 cups all-purpose flour
- 1 tablespoon olive oil, plus extra for greasing and brushing
- 1 tablespoon honey
- 1½ teaspoons kosher salt
Instructions
1. Activate the Yeast
Combine the yeast and lukewarm water in a bowl. Let it sit for about 5 minutes, until foamy.
If the yeast doesn’t foam, check the expiration date. You may need fresh yeast.
2. Mix the Dry Ingredients
In a large bowl or the bowl of a stand mixer, combine the whole wheat flour, all-purpose flour, and salt.
3. Add the Wet Ingredients
Stir the olive oil and honey into the yeast mixture. Pour the liquid into the flour mixture.
4. Knead the Dough
Using a dough hook, mix on low for about 3 minutes, or until the dough is smooth and elastic.
You can also knead by hand. Turn the dough onto a clean surface and knead for about 10 minutes, until smooth and elastic. The dough should bounce back when gently pressed.
5. Let It Rise
Shape the dough into a ball and place it in a lightly oiled bowl. Cover and let it rise for about 1 hour, or until doubled in size.
6. Divide the Dough
Preheat the oven to 400°F.
Turn the dough onto a lightly floured surface and knead for about 15 seconds. Divide it into 4 equal pieces and shape each into a ball.
Flatten each ball into a disk and let them rest for 5 minutes.
7. Stretch the Dough
Take one dough disk and gently pull and stretch it until it’s about 9 inches across. Keep the dough fairly thin so the finished crust gets crisp.
8. Pre-Bake
Place the dough on a baking sheet or pizza pan and bake for 5 minutes.
9. Add Your Toppings
Remove the crust from the oven and add pizza sauce, cheese, vegetables, or your favorite toppings.
Return it to the oven and bake for about 10 minutes more, or until the crust is crisp and the toppings are cooked.
10. Serve
Let the pizza cool for a few minutes, then slice and serve.
Notes
- Check your yeast: Make sure the yeast foams before continuing. This is a quick way to make sure it’s active.
- Don’t skip the rise: The resting time helps the dough develop its texture and makes it easier to stretch.
- Keep the crust thin: A thinner crust will bake up crispier.
- Make extra: The four dough rounds can be prepared ahead and frozen for future pizza nights.
- Author: Miks